Radon is one of those invisible threats that most homeowners don’t think about until they’re staring at test results showing elevated levels in their basement.
Radon is a radioactive gas that contaminates the air inside homes, making indoor air quality a serious concern for your health. When that happens, the first question is usually about cost. How much will it take to fix this problem, and what factors determine whether you’ll pay on the lower or higher end of the spectrum?
The truth is that radon mitigation costs vary significantly based on your home’s unique characteristics, the severity of the contamination, and the type of system required. Understanding these variables helps you budget appropriately and makes conversations with mitigation professionals more productive.
Table of Contents
Why Radon Mitigation Matters
Before diving into costs, it’s worth understanding why this investment matters. Radon is a radioactive gas that seeps into homes from the ground below. It’s the second leading cause of lung cancer in the United States, responsible for thousands of deaths annually.
The Environmental Protection Agency recommends taking action when radon levels reach 4 picocuries per liter or higher.
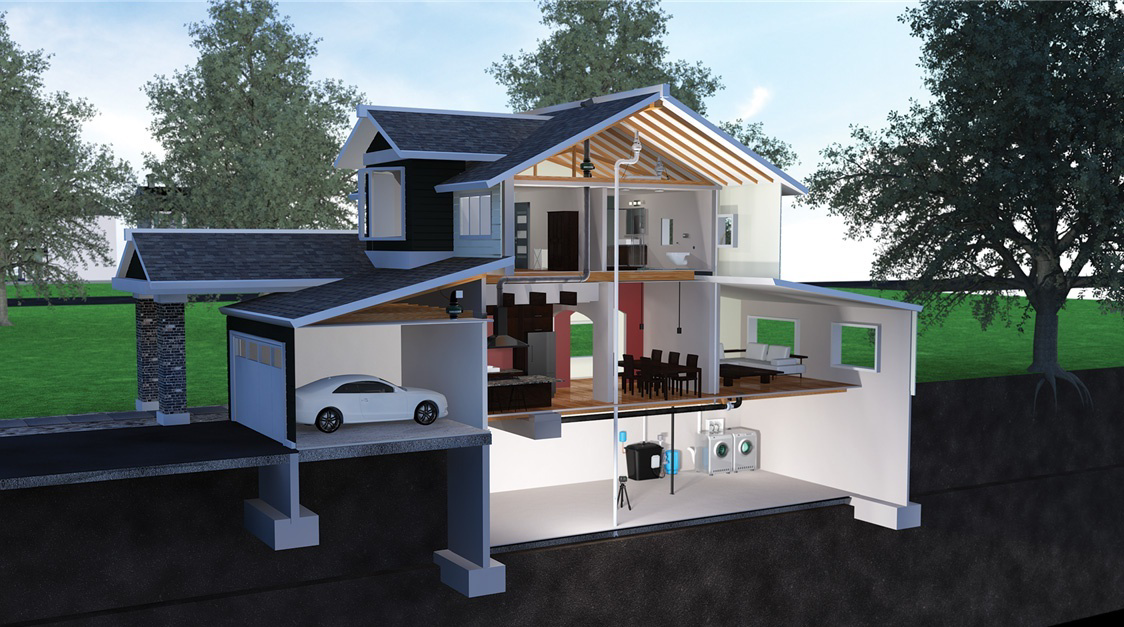
Your home’s foundation acts like a vacuum, pulling radon up from the soil through cracks, gaps, and porous materials. Once inside, it accumulates in enclosed spaces, particularly basements and lower levels where you and your family spend time.
Mitigation isn’t optional when levels are high. Mitigating radon levels is essential for protecting health, as it directly reduces your risk of exposure and related illnesses. It’s a health necessity that protects everyone living under your roof.
Average Radon Mitigation Costs
Most homeowners spend between $800 and $2,500 for a complete radon mitigation system installation. The national average hovers around $1,200 to $1,500 for a standard system in a typical single-family home. The radon mitigation system cost can range from $500 to $3,000 depending on various factors.
However, these figures represent general ranges. Your actual cost can vary depending on multiple factors that we’ll explore in detail. Costs may vary widely based on the size and design of your home, as well as the specific reduction methods required.
Some homes require systems on the simpler end, while others need more complex solutions that push costs higher.
Geographic location plays a role too. Areas with high radon prevalence often have more competition among mitigation contractors, which can drive prices down. Conversely, regions where radon awareness is lower might have fewer specialists, potentially increasing costs.
Foundation Type and Home Construction
Your home’s foundation is the single biggest factor affecting mitigation costs. Different foundation types require different approaches, and some are significantly more challenging to work with than others.
Basement foundations are typically the most straightforward. A sub-slab depressurization system, which is the most common and effective method, involves drilling through the basement floor and installing pipes that vent radon from beneath the foundation to above the roofline.
The radon pipe is a PVC pipe that vents radon outside and must be at least 10 feet above ground. Sealing cracks and openings in the foundation is also essential to limit the flow of radon and make the radon mitigation system more efficient.
The radon fan, which creates the necessary suction, is typically located in an unconditioned space such as an attic, garage, or outside to prevent radon from leaking back into the home.
This process is relatively standardized and falls on the lower end of the cost spectrum, and is designed to keep indoor radon levels below the EPA action level of 4.0 pci l.
Crawl spaces present different challenges. These areas require a plastic vapor barrier installation to seal the ground, followed by a ventilation system that pulls radon from beneath the barrier and vents it outside.
The added labor of installing the barrier and working in cramped conditions increases costs. Homes built on slab foundations can be the trickiest. Without a basement or crawl space, contractors must either drill through the slab itself or use alternative methods like sub-membrane depressurization if there’s accessible soil beneath.
These installations often cost more due to increased complexity. Split-level homes and properties with multiple foundation types may need more than one mitigation point, substantially increasing the overall investment.
Home Size and Complexity
Square footage matters, but not in the way you might expect. A larger home doesn’t automatically cost more if it has a single foundation type and straightforward layout. However, homes with multiple levels, additions built at different times, or unusual architectural features often require more extensive systems.
Most homes can be fixed for about the same cost as other common home repairs, making radon mitigation accessible and manageable for the majority of residences.
Each distinct foundation area may need its own suction point. A home with a basement, attached garage on a slab, and a small crawl space addition could need three separate collection points, tripling the base cost.
Interior finishing also affects pricing. If your basement is finished with drywall, hardwood floors, or other permanent materials, the contractor must either work around these features or remove and replace sections to install piping. This adds labor hours and material costs.
System Components and Quality
Not all radon mitigation systems are created equal. The components used significantly impact both upfront costs and long-term performance.
The radon fan is the heart of the system. Radon mitigation systems use a fan to continuously pull air from the soil and vent it outdoors through a pipe that ends above the edge of the roof.
Basic fans might last five to seven years, while higher-quality models can run for 15 years or more. Spending more upfront on a reliable fan often saves money over time by reducing the frequency of Radon System Repair & Fan Replacement needs.
PVC piping quality matters too. While all systems use PVC to vent radon gas, the diameter, thickness, and routing of these pipes affect system efficiency and longevity.
Proper installation with adequate support and appropriate sealing ensures the system maintains negative pressure beneath your foundation. Maintaining the system’s effectiveness depends on both proper installation and the use of quality components.
Some contractors include monitoring devices that continuously measure system performance. These aren’t always standard but provide peace of mind that your system is working correctly. They can also alert you to potential issues before they become serious problems.
Radon Levels and Vapor Intrusion Severity
The initial radon concentration in your home influences system design. Homes with moderately elevated levels (4 to 10 picocuries per liter) typically need standard systems. Properties with very high readings (above 20 picocuries per liter) might require more aggressive solutions with multiple suction points or higher-capacity fans.
Various radon reduction methods are available depending on home size and design, and a licensed radon mitigation professional should determine the type of mitigation system to install. The professional may also conduct diagnostic testing to ensure the best approach for your specific situation.
Vapor Intrusion involves more than just radon. This phenomenon occurs when volatile chemicals from contaminated soil or groundwater enter buildings through the same pathways radon uses.
If your property has known soil contamination or sits near former industrial sites, mitigation might need to address multiple contaminants simultaneously, increasing complexity and cost.
Testing reveals the scope of the problem. Comprehensive testing that identifies entry points and measures concentrations throughout the home guides system design. While this adds to initial expenses, it ensures the installed system actually solves your specific problem rather than taking a generic approach that might not work.
Professional Expertise and Certification
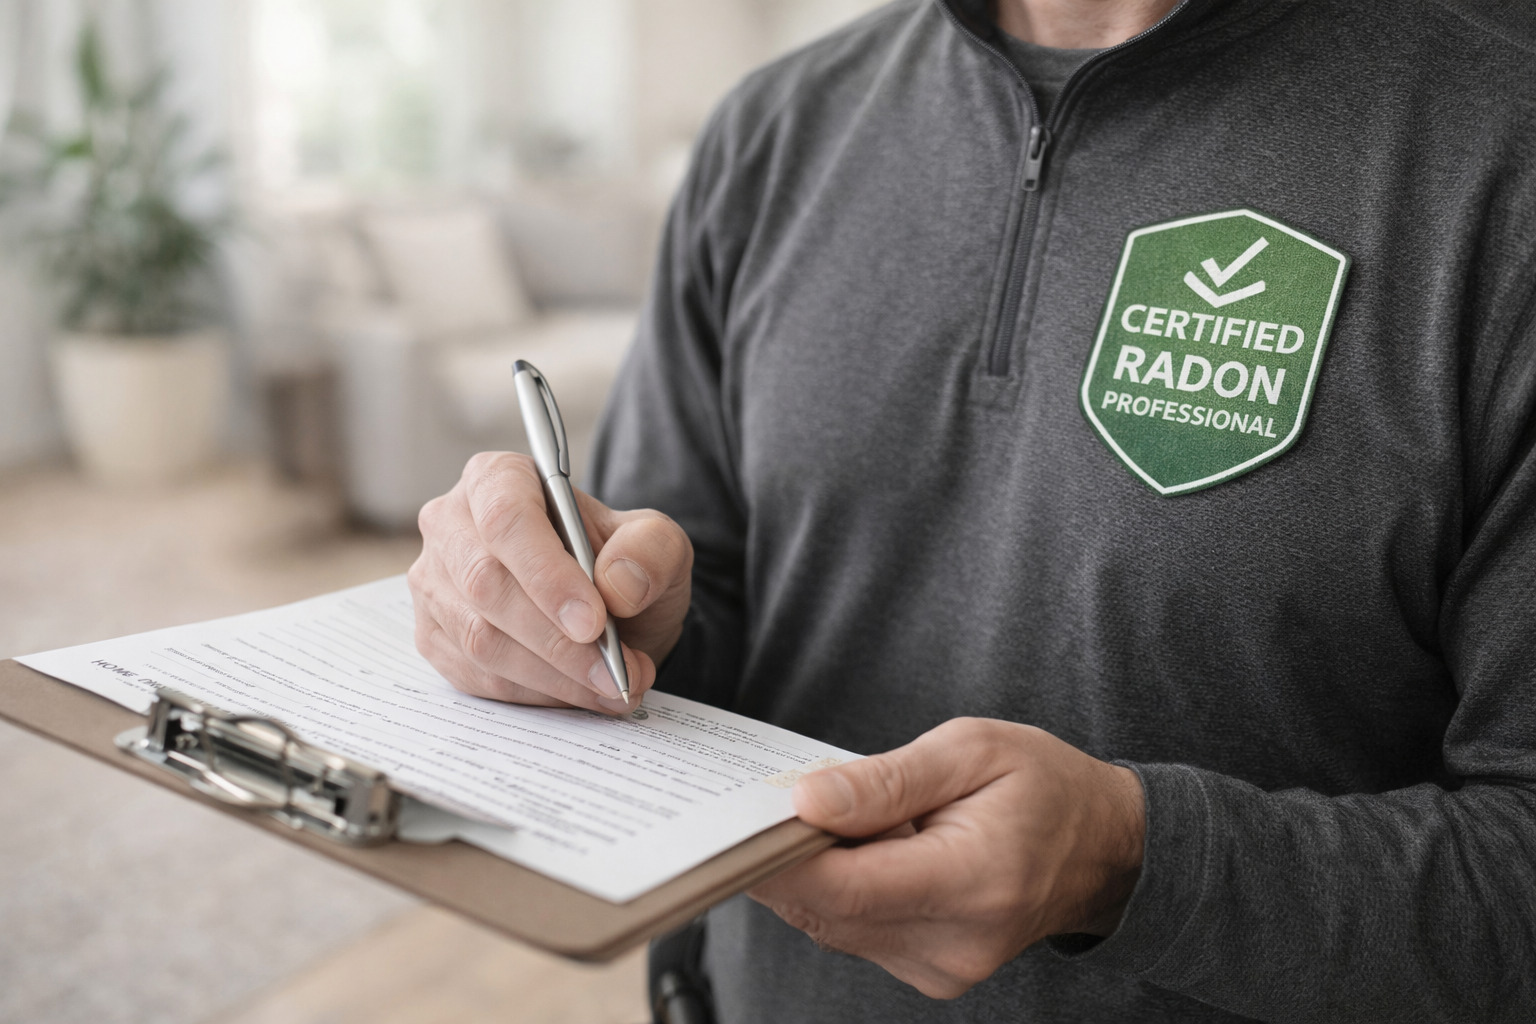
Radon mitigation isn’t a DIY project for most homeowners. It requires specific knowledge of building science, soil gas dynamics, and proper installation techniques. Hiring a certified professional ensures the work is done correctly.
Certification matters. Look for contractors certified by the National Radon Proficiency Program or the National Radon Safety Board. These professionals have demonstrated competency through testing and maintain their certification through continuing education.
Certified contractors typically charge more than uncertified handymen, but the investment is worthwhile. A properly installed system protects your family effectively, while a botched job might not reduce radon levels adequately and could even create new problems like moisture issues or structural damage.
Geographic Considerations and Local Contractors
Where you live affects both radon risk and mitigation costs. The EPA’s radon zone map identifies areas with high potential for elevated radon levels. These zones tend to have more established mitigation industries with competitive pricing.
Working with local specialists like Milwaukee Radon Home provides advantages beyond cost. Local contractors understand regional building practices, soil conditions, and common challenges specific to your area. They’re also more accessible for follow-up service and Radon System Repair & Fan Replacement when needed down the road.
Getting multiple quotes is standard practice, but the cheapest option isn’t always the best. Compare what’s included in each estimate: warranty terms, fan quality, post-installation testing, and the contractor’s experience level. A slightly higher upfront cost with a reputable company often delivers better value over time.
Permits, Regulations, and Code Requirements
Most municipalities require permits for radon mitigation system installation. Permit costs are usually modest, ranging from $50 to $200, but they ensure work meets local building codes.
Some jurisdictions have specific requirements about system design, fan placement, or venting routes. Your contractor should handle permit applications and ensure compliance with all local regulations. If they suggest skipping permits to save money, consider that a red flag.
Homeowners associations may also have rules about visible system components. Exterior piping must typically be routed along less visible areas of the home, and some HOAs restrict where exhaust points can be located. These requirements can increase installation costs if they necessitate longer pipe runs or more complex routing.
Radon-Resistant Construction in New Homes
Building a new home presents a unique opportunity to address radon before it ever becomes a problem.
Radon-resistant construction techniques involve installing a radon reduction system as part of the initial build, which is generally about the same cost or even less expensive than retrofitting a mitigation system after the home is completed.
By planning ahead, homeowners can significantly reduce the risk of elevated radon levels and the associated health risks, including lung cancer.
The EPA offers comprehensive guidance on radon-resistant construction, making it easier for builders and homeowners to incorporate these features from the start.
Techniques may include laying a gas-permeable layer beneath the foundation, installing a plastic sheeting barrier, sealing all foundation openings, and providing a vent pipe that allows radon to escape safely above the roofline.
These proactive steps help ensure that radon concentrations remain low, protecting your family’s health for years to come.
Choosing radon-resistant construction is a smart investment in your home’s safety and value. Not only does it help prevent future radon problems, but it also provides peace of mind that your living environment is built to minimize health risks from the ground up.
If you’re planning to build, ask your contractor about integrating a radon reduction system and consult EPA resources for best practices.
Mitigation System Effectiveness
The effectiveness of a radon mitigation system is determined by several factors, including the type of mitigation system installed, your home’s foundation type, and the initial radon levels present.
When properly designed and installed, a mitigation system can reduce radon levels by as much as 99%, dramatically lowering the health risks associated with radon exposure.
To ensure your mitigation system is working properly, it’s essential to conduct a post mitigation radon test after installation. This verification step confirms that the system is effectively reducing radon concentrations to safe levels.
Regular maintenance is also key over time, components like the fan or PVC pipe connections may require attention to maintain the system’s effectiveness. Scheduling periodic inspections helps catch any issues early and keeps your mitigation system operating at peak performance.
By investing in a quality radon mitigation system and staying on top of maintenance, homeowners can reliably reduce radon levels and create a healthier indoor environment.
The right system, tailored to your home’s foundation and specific needs, offers long-term protection and peace of mind.
Integration with Other Repairs
Combining radon mitigation with other home repairs is a cost effective strategy that can save both time and money. For example, if you’re already planning to install a sump pump, waterproof your basement, or repair your foundation, it’s an ideal opportunity to address radon mitigation at the same time.
This integrated approach allows contractors to coordinate work, minimize disruptions, and often reduce overall installation costs.
A professional contractor can help homeowners determine the best way to integrate radon mitigation with other repairs, ensuring that all systems work together efficiently.
By tackling multiple projects simultaneously, you can address several potential hazards at once, improving your home’s safety and value. This approach not only streamlines the repair process but also helps prevent future issues that could arise from piecemeal fixes.
If you’re considering major home repairs, ask your contractor about including radon mitigation in the project plan. This proactive step can lead to a safer, healthier, and more secure home environment.
DIY vs Professional Installation
While the idea of installing a radon mitigation system yourself might seem appealing, professional installation is strongly recommended for most homeowners.
A certified contractor brings the expertise needed to design a mitigation system that’s tailored to your home’s unique layout, foundation type, and radon levels. Professional installation ensures that the system is installed correctly, maximizing its effectiveness in reducing radon and protecting your family’s health.
A professional contractor will also verify that the system is working properly through post-installation testing and provide guidance on regular maintenance to keep the system operating efficiently.
Attempting a DIY installation can lead to common mistakes such as improper fan sizing, incorrect exhaust pipe placement, or inadequate sealing that may reduce the system’s effectiveness or even increase radon levels in your home.
By choosing professional installation, homeowners can be confident that their radon mitigation system is built to last and provides reliable, long-term protection. Investing in expert help not only ensures compliance with local codes and regulations but also delivers peace of mind that your mitigation system is truly safeguarding your home.
Post-Installation Testing and Monitoring
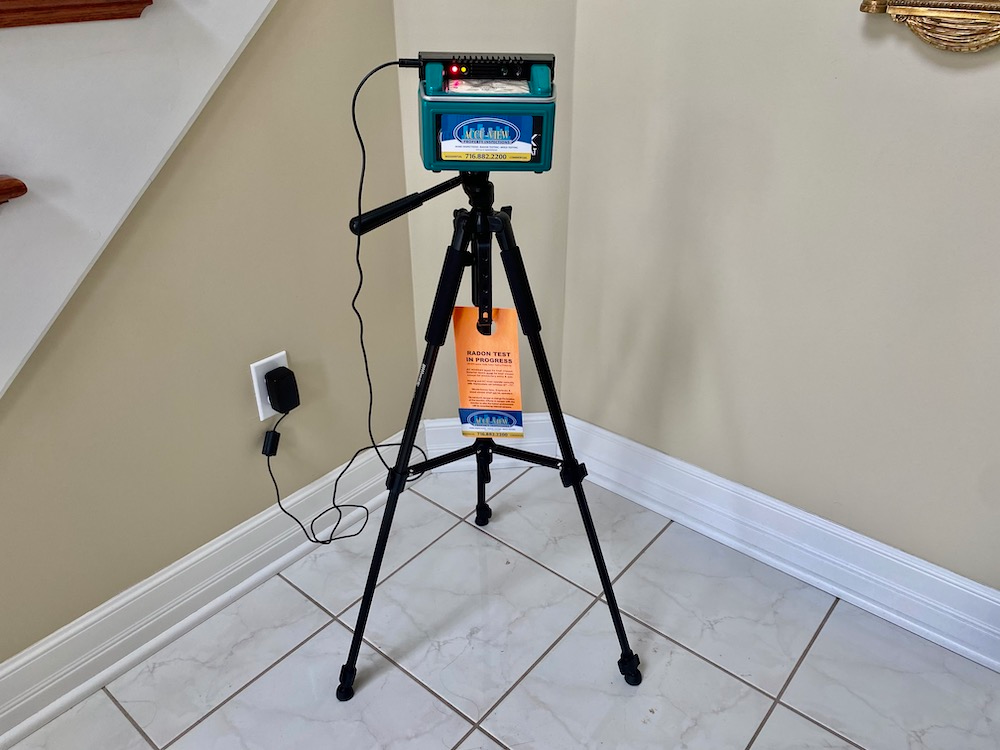
A quality mitigation contractor includes post-installation testing to verify the system reduced radon to safe levels. This testing typically occurs 24 to 48 hours after system activation and should show levels below 4 picocuries per liter, preferably below 2.
Some contractors include this testing in their base price, while others charge separately. Either way, it’s essential. Without verification testing, you can’t be certain the system is working as intended.
Long-term monitoring is also recommended. The EPA suggests retesting every two years to ensure continued effectiveness. Additionally, any significant home renovations or changes to the HVAC system warrant retesting, as these alterations can affect radon entry and distribution patterns.
Ongoing Maintenance and Operating Costs
Radon mitigation systems aren’t install-and-forget solutions. They require ongoing operation and periodic maintenance to remain effective.
Electrical costs are modest. Most radon fans consume between 50 and 200 watts, adding roughly $15 to $30 to annual electricity bills. Higher-capacity systems at the upper end of that range still cost less to operate than a standard lightbulb running continuously.
Fans eventually wear out. Even quality units need replacement every 10 to 15 years. Budgeting for future Radon System Repair & Fan Replacement helps avoid sticker shock when the time comes. Fan replacement typically costs $200 to $500, depending on the unit and whether any additional repairs are needed.
Periodic system checks ensure everything is functioning correctly. Look for warning signs like unusual noises from the fan, visible cracks in PVC piping, or the absence of suction at test holes. Many contractors offer annual maintenance contracts that include system inspection and minor adjustments.
When to Consider System Upgrades
Some situations justify investing in more advanced or comprehensive systems beyond basic mitigation.
If you’re planning major renovations, coordinate mitigation work with construction activities. Installing a system before finishing a basement is far more cost effective than working around completed spaces. Similarly, if you’re adding onto your home, ensure the mitigation system can handle the expanded footprint.
Smart home integration is increasingly available. Some newer systems include Wi-Fi-connected monitors that alert you via smartphone if system performance drops. While these add to upfront costs, they provide real-time peace of mind and enable quick responses to problems.
Energy-efficient fans represent another upgrade option. Variable-speed models adjust power consumption based on current conditions, reducing operating costs over the system’s lifetime. The additional upfront expense may be offset by electricity savings, especially in homes with very high initial radon levels requiring powerful fans.
Questions to Ask Contractors
Before hiring someone, have a conversation that goes beyond price. Ask about their certification status and how long they’ve been installing systems.
Request references from recent customers and follow up with those homeowners about their experiences. Be sure to review bids, questions you have, and the contractor’s approach carefully to ensure proper radon mitigation.
Understand what’s included in the quote. Does it cover post-installation testing? What warranty is provided on both labor and materials? How long has the contractor been in business, and will they be available for future service needs?
Inquire about their approach to your specific situation. A contractor who asks detailed questions about your home’s construction, performs a thorough initial assessment, and explains their recommended approach demonstrates professionalism and expertise.
If you need immediate assistance or have questions about radon mitigation in your area, reaching out to established professionals makes sense. For homeowners in southeastern Wisconsin, calling 414 455 7279 connects you with experienced specialists who can assess your situation and provide detailed information about your options.
Real Estate Considerations
If you’re buying or selling a home, radon becomes a transaction issue. Many buyers request radon testing as part of home inspections, and elevated levels can affect negotiations.
Sellers sometimes install mitigation systems before listing to avoid complications during the sale process. While this represents an upfront investment, it can justify asking prices and prevent deals from falling through over radon concerns.
Buyers who discover elevated radon during inspections typically negotiate for either seller-paid mitigation or a price reduction covering installation costs. Understanding typical costs for your home’s characteristics helps you negotiate effectively from either position.
Documentation matters in real estate transactions. Keep all radon test results, mitigation system installation records, and post-installation verification tests. These documents demonstrate to future buyers that the issue was properly addressed by qualified professionals.
Insurance and Financial Assistance
Standard homeowners insurance doesn’t typically cover radon mitigation, as it’s considered a pre-existing environmental condition rather than sudden damage. However, some policies may cover Radon System Repair & Fan Replacement if the system is damaged by a covered peril like fire or storm damage.
Limited financial assistance programs exist in some states and localities, particularly for low-income homeowners. Check with your state radon office to learn about available programs in your area. Some states offer grants or low-interest loans for mitigation work.
Health savings accounts and flexible spending accounts may allow you to use pre-tax dollars for radon mitigation since it’s a health-related expense. Consult with a tax professional about whether this option applies to your situation.
Making the Investment Decision
Radon mitigation represents a significant expense, but it’s an investment in health and home value. When levels are elevated, the question isn’t whether you can afford mitigation but whether you can afford not to address it.
Consider the long-term picture. Divided over the system’s 15 to 20-year lifespan, the annual cost becomes quite modest compared to the health protection provided. For a $1,500 system lasting 15 years, you’re spending $100 per year to significantly reduce lung cancer risk for everyone in your household.
In fact, radon mitigation is one of the common home repairs that homeowners may encounter, similar in cost and complexity to other common home repairs like painting or replacing a hot water heater, making it a standard, manageable expense within routine household maintenance.
Compare this to other health and safety investments homeowners routinely make. Smoke detectors, carbon monoxide alarms, and home security systems all protect against specific threats. Radon mitigation does the same for a risk that’s often more prevalent and potentially more dangerous than the threats those devices address.
Frequently Asked Questions
How long does radon mitigation system installation typically take?
Most residential radon mitigation systems can be installed in a single day, typically requiring four to six hours for a straightforward installation. However, more complex homes with multiple foundation types or challenging layouts might need two days.
Can I install a radon mitigation system myself to save money?
While technically possible for someone with construction experience, DIY radon mitigation is generally not recommended for several important reasons. Improper installation can fail to reduce radon levels adequately, create moisture problems, or even increase radon in living spaces.
What happens if my radon levels are still high after mitigation?
Reputable contractors guarantee their work and will return to adjust or enhance the system at no additional charge if post-installation testing shows levels remain above 4 picocuries per liter. This might involve adding additional suction points, upgrading the fan, or sealing additional entry points.
Do radon mitigation systems require regular maintenance?
Radon mitigation systems require minimal but important ongoing attention to maintain effectiveness. The fan should be checked periodically to ensure it’s running properly, which you can verify by listening for operation noise or checking the system’s pressure gauge if one is installed.
Will a radon mitigation system affect my home’s resale value?
A professionally installed radon mitigation system generally has a neutral to positive effect on resale value because it demonstrates that a known issue has been properly addressed. Buyers appreciate that the problem has already been solved by certified professionals, often viewing the installed system as a valuable feature rather than evidence of a defect.
Conclusion
Understanding the cost factors involved in radon mitigation helps you approach this important home improvement project with realistic expectations and informed decision-making.
While expenses vary based on home characteristics, foundation types, and system complexity, the investment protects your family’s health and maintains your property’s value.
The range between basic installations and complex systems is significant, but working with qualified professionals ensures you get a solution matched to your specific situation rather than overpaying for unnecessary features or underspending on an inadequate system.
Geographic factors, including working with knowledgeable local contractors who understand regional building practices and soil conditions, contribute to successful outcomes at fair prices.
Beyond the initial installation, factor in ongoing operating costs and eventual maintenance needs when budgeting.
These expenses are modest compared to the continuous protection provided, and proper maintenance extends system life while ensuring consistent performance.
Whether you’re addressing a known radon problem or installing a system during new construction, the health benefits far outweigh the financial investment, making radon mitigation one of the most valuable improvements you can make to your home.