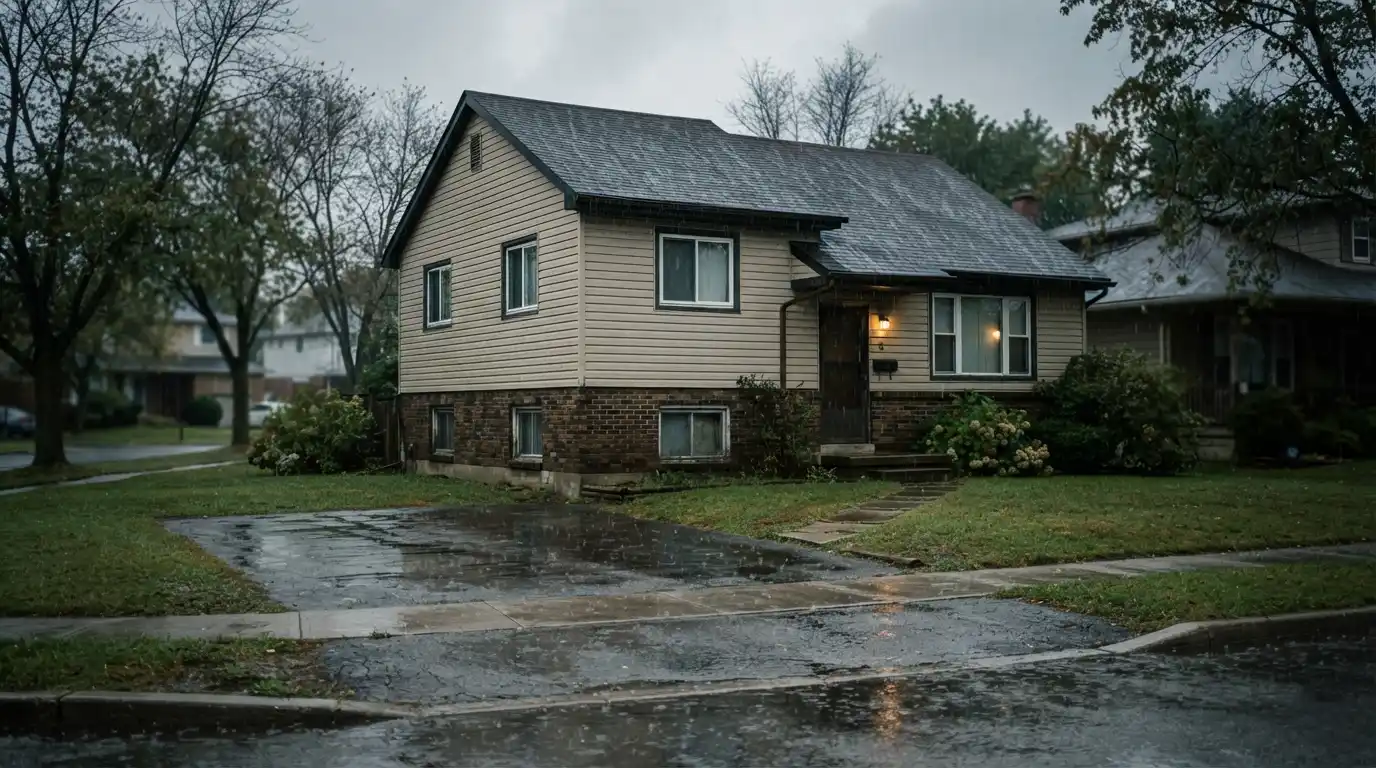
A quiet danger in many homes is radon, a naturally occurring radioactive soil gas. Even without any scent or visual cue, it can accumulate in basements and living spaces. The only way homeowners can protect their families is through a clear, step‑by‑step pathway: radon testing and mitigation.
The pathway begins with knowledge exact data about your home’s radon level. When you know the numbers, you can decide what system will bring the gas down. The process after the decision is to set up a system that captures the gas, seal the holes that let it back in, and keep the safeguards under control for years.
- Radon is a non‑colorful gas that comes from soil, visible only through testing.
- The EPA action level is 4 picocuries per liter; a reading above this means you need a solution.
- Typical solutions include a sub slab suction system, a sealing job, or in some homes a positive pressure design.
- After installation, a yearly test checks that the system still works and protects generations.
Table of Contents
What Is Radon?
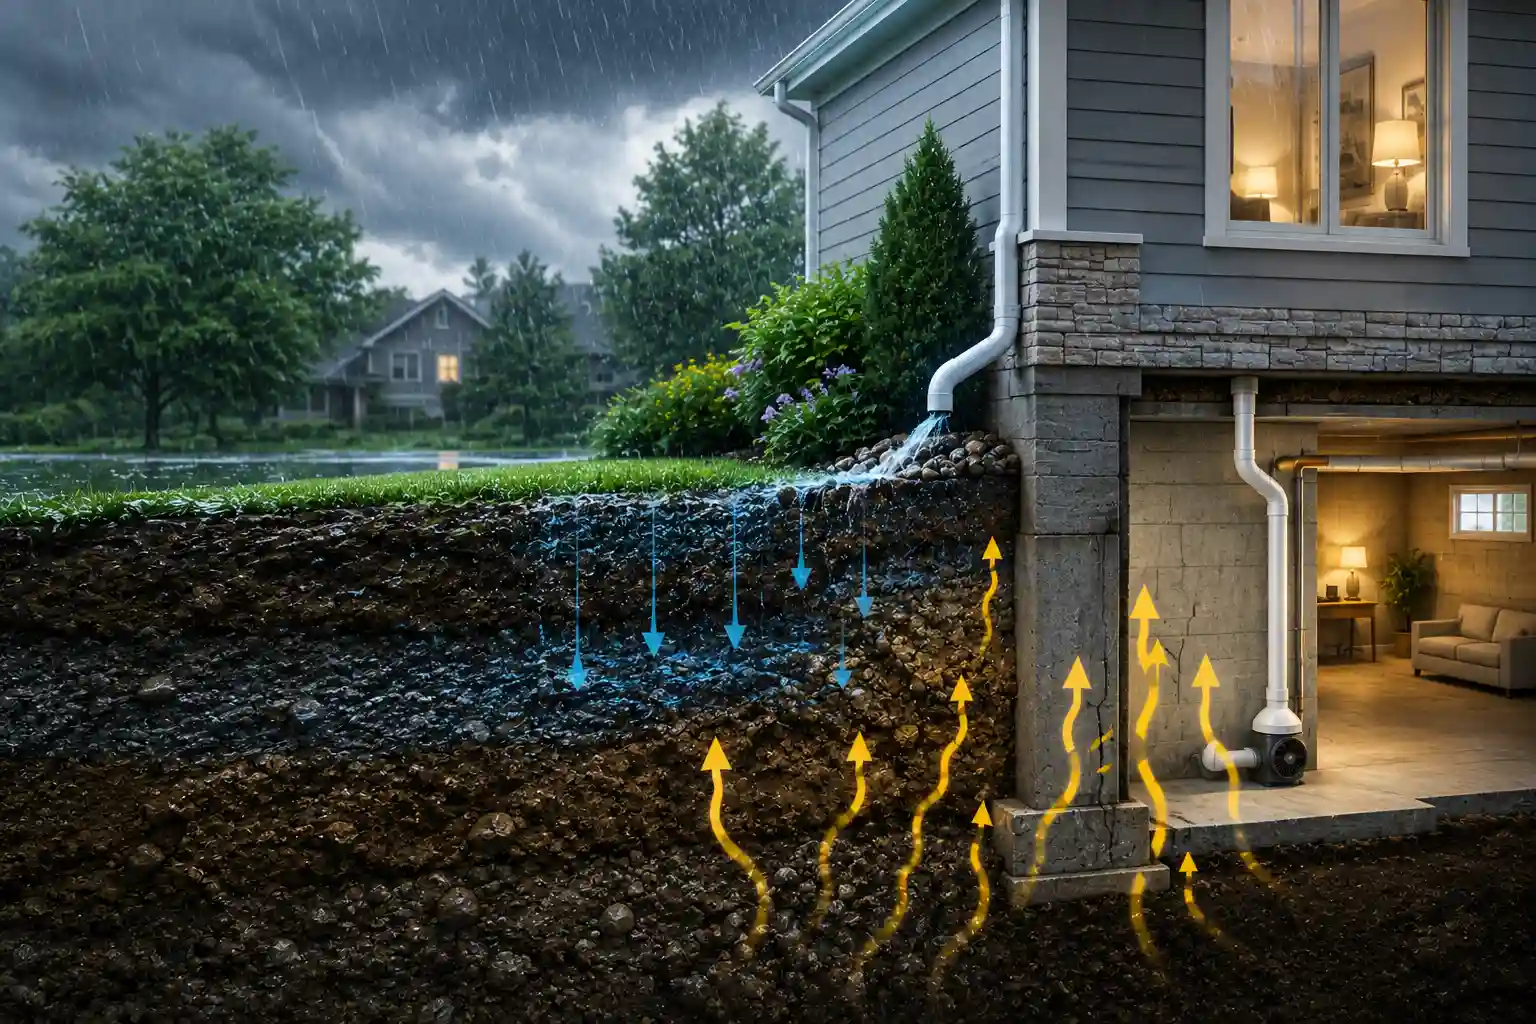
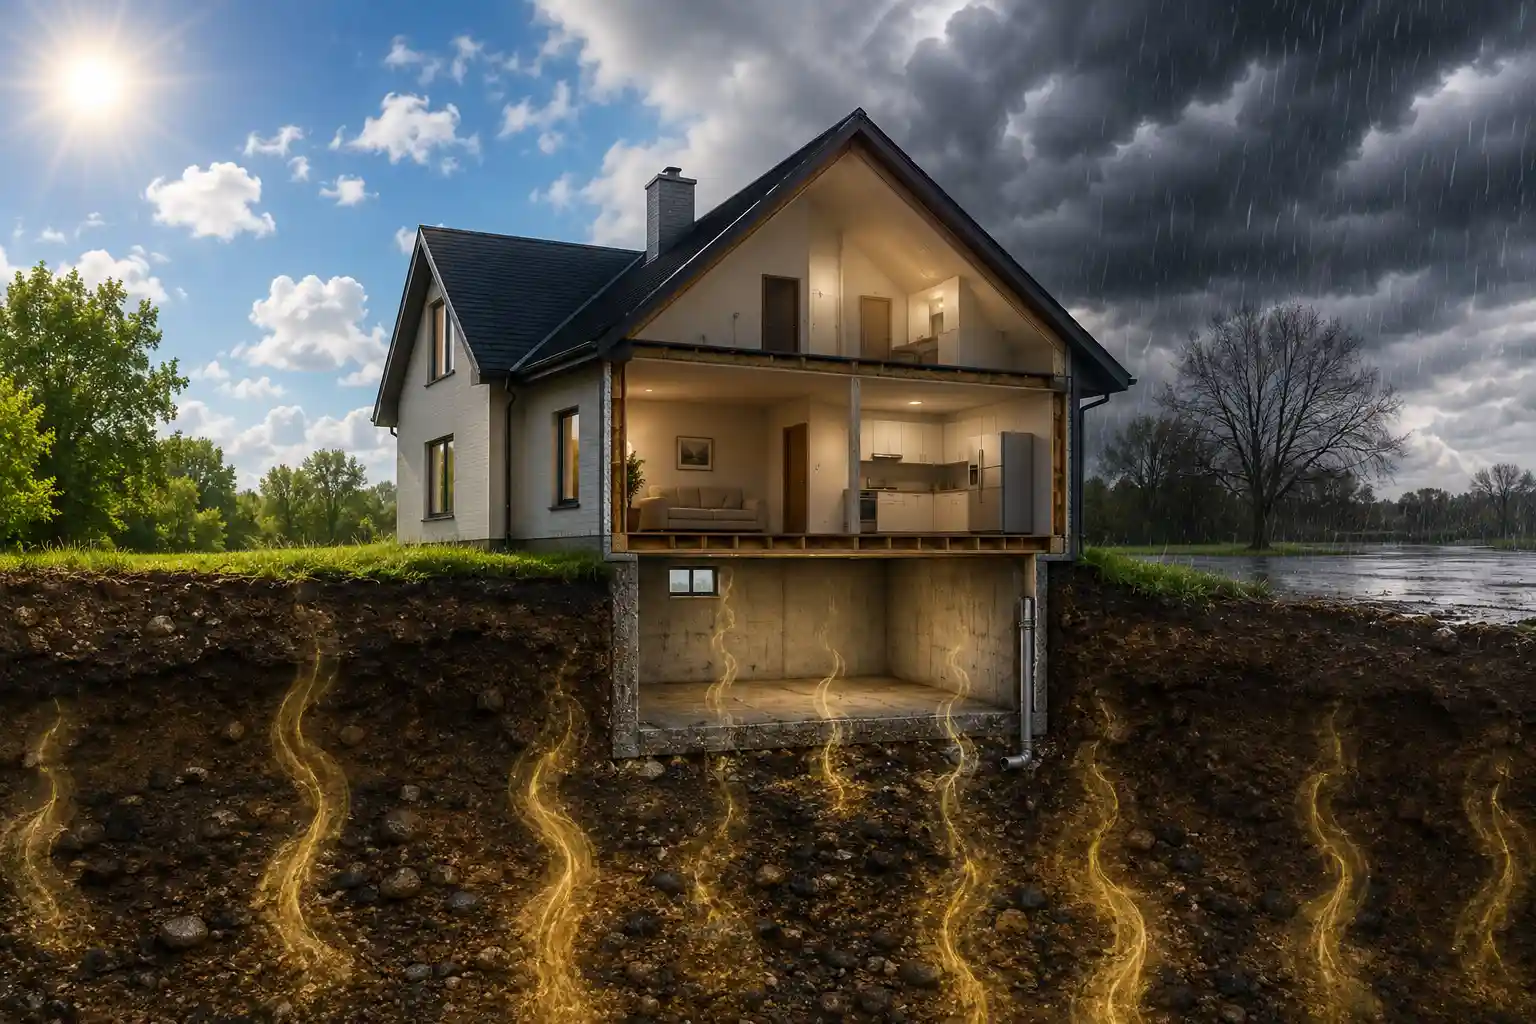
Radon is the product of uranium decay in the earth’s crust. It is a noble gas and does not react with surfaces or become trapped in walls. It migrates through sub ground voids, and when a building sits on that soil, it can penetrate through cracks, pipes, and condensation paths.
Because radon is invisible and does not carry any noticeable odor, the only way to know if a house is at risk is through measurement. The EPA describes radon as the second leading cause of lung cancer after smoking. On a national scale, it kills over 15,000 people a year, many of them who had no tobacco habit.
Homes built on soils with high uranium can have radon rising even if they have well‑sealed foundations. A single measurable spike may occur after a seismic event, a heavy storm or a shallow renovation that cracks the basement walls.
It is for these facts that a straightforward approach radon testing and mitigation turns an unseen danger into a quantifiable problem with a commercial solution.
Why Testing Is Critical
Testing is more than a tick of a box for sellers, it is the data that defines all future work at a safe home. A thorough test shows:
- The actual radon concentration in the air.
- The variation between seasons (when winters compress the ground, or summers allow soil airflow).
- The direction of pressure differential between the building and the soil.
These data are the framework that decides whether a simple sealing job will suffice, or if a full suction setup is required. Many homeowners think they can rely on their building’s age or region, but radon does not discriminate. Different basements and roofs can have dissimilar causes for the same grain, despite similar locations.
The investment in testing usually a modest $200 to $400 for a 90‑day professional reading creates an accurate baseline that protects your family for decades.
Testing Tools and Methods
Short Term Kits
A small card or intaglio chamber sealed with a charcoal can can stay for 30 to 90 days. The homeowner then brings the can back for a read‑out from a lab that translates the deposit into picocuries per liter. These kits usually cost between $30 and $100 at a local hardware store. Many DIY kits have an associated app that includes a printable chart and simple instructions for where to place the kit for maximum accuracy.
Long Term Monitors
Long term systems attach a sensor to a small backpack worn inside the home for up to 12 months. Because radon levels can fluctuate seasonally, the long monitor gives a robust average that is more reflective of a home’s typical exposure. Prices range from $500 to $1,200 for a full year’s monitoring, and the data are stored electronically for a professional review later.
Professional Testing
A licensed technician can run a short term or long term test while on the premises. They use calibrated equipment that satisfies EPA certification.
The technician then provides a written report and undertakes a floor plan drawing that marks the testing location. For homes that are slated for a set of renovations, the technician can also run short term sub‑tests before and after the project to quantify any change that has occurred.
The entry price for a professional 90‑day test is $200 to $400, with a standing‑by plan for a 3 to 12 month reading at $700 to $900.
All forms of testing feed into radon testing and mitigation and set you on a proven path.
Reading Results and Setting Goals
The data from any test is presented in picocuries per liter. The standard threshold is 4 picocuries per liter.
| Result < 4 pCi/L | What it means |
|---|---|
| < 2 pCi/L | Consider annual monitoring, usually sufficient. |
| 2 – 4 pCi/L | Keep an eye on a 12 month test; treat if you experience cost. |
| ≥ 4 pCi/L | Initiate a radon testing and mitigation plan immediately. |
While the numbers give you a clear direction, they also help you evaluate the cost of different solutions. Nobody wants to pay for a mitigation that will never be needed, but no one wants to stand under a radon‑filled environment for years either.
Mitigation Strategies Overview
The goal for radon testing and mitigation is always to bring radon down to less than 2 pCi/L, although reaching below 0.4 or even 0.1 is possible with strong systems. Different pro‑team designs produce this goal with varying degrees of labor and cost.
- Sub‑basement Suction – The gold standard.
- Sealing a foundation – A layer of bonding material and proper caulking.
- Positive Pressure – A fan pulls air out through roof vents.
A strategic approach often requires a mix. For example, a home with an attached garage may need a seismic duct ventilation in addition to a suction system.
Having a professional evaluate the home ensures that radon testing and mitigation follows the two‑phase rule: first confirm with a test, then apply the solution with data backing it.
Soil Suction System Design
The most reliable solution for many basements is the sub‑slab suction system. Steps are:
- Insert a perforated pipe into the soil under the foundation walls. The pipe is 12 inches wide, segmented every 3 or 4 feet, and designed to let radon flow freely into it.
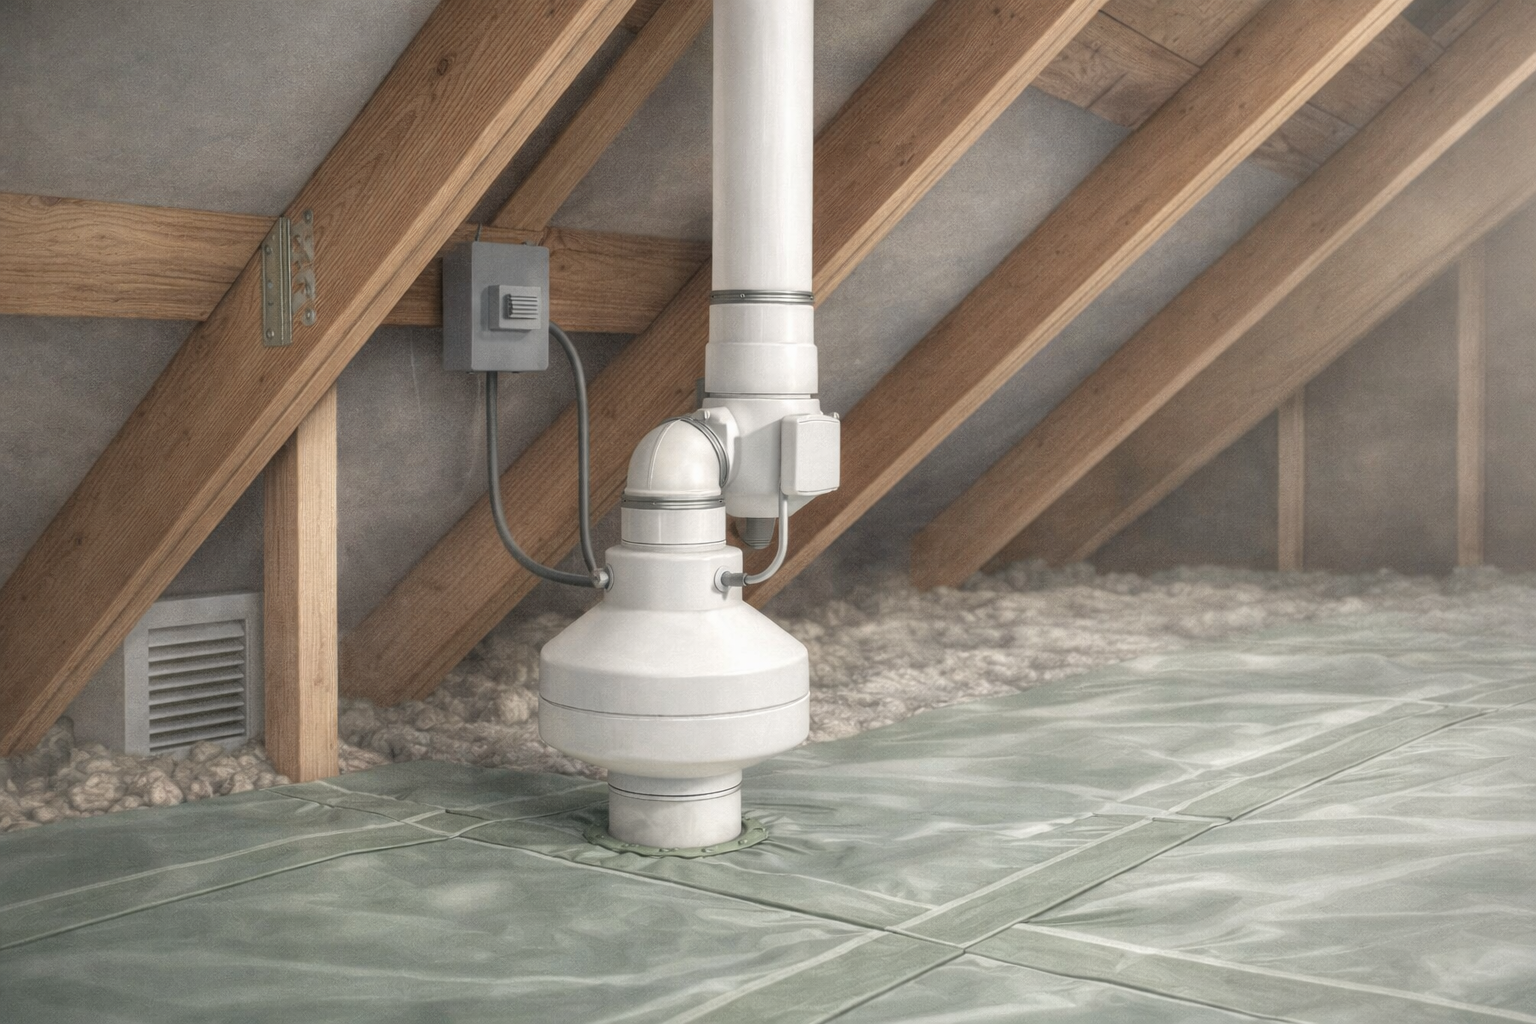
- Install a low‑power fan that runs on a low voltage supply, ideally at 30 cubed feet per minute for the home’s size. The fan pulls air from the pipe.
- Connect the fan to a vent stack that extends to the roof and releases air outside the building. The stack shape is designed to aggregate radon‑rich gas from the floor, open up a path to the outside, and create a slight negative pressure below the slab.
- Seal the cut‑in area where the pipe enters the foundation with a high‑density polyurethane sealant so radon cannot find a breadcrumb route back into the home.
The system is usually in place for 2 to 6 weeks, after the piece has settled. The homeowner gets a chart that has a baseline application and an approved tolerances level.
After installation, the contractor provides a weekly or monthly log that includes the fan’s status and the air pressure measurement.
For a typical home, the costs for a full sub‑subletting system range from 1,500 to 3,000 US dollars. The system’s longevity can amount to 15 to 20 years.
Sealing and Positive Pressure
Sealing
Sealing is the first–line defence against radon. Faulty sealing on an old foundation can have gas seeping back into the space through cracks in floors or walls. The best caulking with a heavy‑weight, radon‑resistant latex is applied after cleaning the area.
Radon testing and mitigation needs the foundation to be sealed tightly; otherwise the suction system may fail to maintain a negative pressure.
Positive Pressure System
Some homes are built on solid dolomite rock that expels large radon volumes. In such cases, a diesel or empty net positive pressure fan increases the home’s interior air pressure.
The fan delivers about 2 to 4 cubic feet per minute. The air flows through a roof vent that is vented to the external atmosphere. Because the home’s pressure is slightly above the soil, radon flows out instead of free‑wind in.
Positive pressure systems can be combined with a sub‑slab suction if the groundwater level is high.
In both methods, the core idea for radon testing and mitigation is a two‑fold: pull radon out, seal it away, and fence the path. The result is a new baseline capturing protective air quality.
Maintenance, Follow‑Up, and Warranty
| Navigation | Frequency | Notes |
|---|---|---|
| Fan inspection | Every six months | Check for dust on the motor and that it turns on. |
| Seal inspection | Annually | If cracks appear, fill them with sealer. |
| Annual test | Once a year | Re‑measures the radon and shows that system performance stays under 4. |
Most companies provide a warranty of 10 years on the fan and 5 years on installation.
By setting up a maintenance routine, every part of radon testing and mitigation lives up to the home’s safety guarantee.
Cost Breakdown and Financing
| Item | Unit Cost | Notes |
|---|---|---|
| Short term test kit | 30 – 100 | Do‑it‑yourself or purchase. |
| Professional short term | 200 – 400 | 90‑day sample. |
| Long term test for one year | 500 – 1,200 | Shows seasonal variation. |
| Sub‑slab suction installation | 1,500 – 3,000 | The core of most mitigations. |
| Positive pressure system | 800 – 2,000 | Needed for high‑flux homes. |
| Annual maintenance | 100 – 250 | 10% of system cost. |
Financing options: many contractors offer 0% financing for 12 months on the system cost, or a $300 down payment for a fuel bill coverage.
The total estimate for a standard system with ongoing service can range from 5,500 to 10,000 dollars over a decade. That level of investment keeps families safe and property values stable.
Choosing a Contractor
A contractor like Milwaukee Radon Mitigation with a clean air certified license is a must. They must show proof of:
- State license (or local permitting).
- A current insurance policy that covers the property.
- At least 5 years of radon solutions experience.
Ask each contractor:
- What is the expected lifespan of the fan?
- What type of sealant do you use?
- How many similar projects have you completed?
- Do you provide a written guarantee?
A professional that can map out radon testing and mitigation with a detailed plan, timeline, and budget shows a high level of professionalism.
Health, Safety, and Legislation
The EPA says a home with radon above 4 pCi/L must mitigate. Many states go further: they require a radon reporting statement when a home is sold. In some regions, the federal Clean Air Act encourages cost‑sharing for radon mitigation.
By following the radon testing and mitigation approach you meet both health and legal obligations, avoiding penalties and passing a home inspection. When you do the full system your family enjoys a minimized risk of radon‑related lung disease.
Associated Indoor Air Concerns
Your home might still have other indoor pollutants:
- Mold growth after a rainy season.
- Off‑gassing from new paint or new carpets.
- CO₂ backing up in sealed rooms.
Many radon mitigation experts offer a full interior air audit, providing a matching filtration upgrade, or along with mold removal.
The radon testing and mitigation team will often coordinate the cleaning of existing leaks or water damage prior to installing the fan.
FAQs
How long does a radon test last?
A short term test records radon over 30 to 90 days, showing a representative average for the monitoring period.
What if my number is 6 pCi/L?
At 6 pCi/L the EPA recommends starting a full radon radon testing and mitigation program immediately to reduce the exposure.
Can I use a home‑owner kit or should I call a pro?
A kits approach can give a quick baseline, but a professional test will supply a calibrated reading and an engineered solution to tie directly into any radon testing and mitigation plan.
Is the mitigation system loud?
The typical low‑noise fan or belt‑driven motor for radon makes under 30 decibels, so you will rarely hear it in living rooms.
How much will the whole system cost?
A complete sub‑slab suction will usually run between 1,500 and 3,000 dollars, with annual maintenance around 100 to 250.
Conclusion
Radon is invisible, but it is there. By starting with a quick read‑out, setting a realistic mitigation plan, and monitoring the system, you give your family a guarantee that the air inside their home is safe.
The cost usually from 1,500 to 3,000 dollars for a base system plus a yearly upkeep of 100 to 250 represents a long‑term health investment that protects your house and your future.
If you feel the urge to act now, call 414-455-7279 and ask about a free evaluation and install strategy. The phone price is a small price on a safety that stays in place with clearing steps and ongoing patience from radon testing and mitigation.