Mold and radon testing are two separate inspections that protect your home’s air quality and resale value: mold testing detects fungal growth caused by moisture, while radon testing measures radioactive gas seeping up from the soil.
The EPA recommends radon testing every home below the third floor, since levels at or above 4.0 pCi/L require mitigation. Buyers, lenders, and home inspectors increasingly ask for both tests before closing, making combined testing a smart, cost-effective step for any Milwaukee-area homeowner.
Table of Contents
Why Mold and Radon Testing Go Together
Mold and radon share one thing: you can’t see or smell either one at dangerous levels. Both problems build silently inside walls, basements, and crawl spaces.
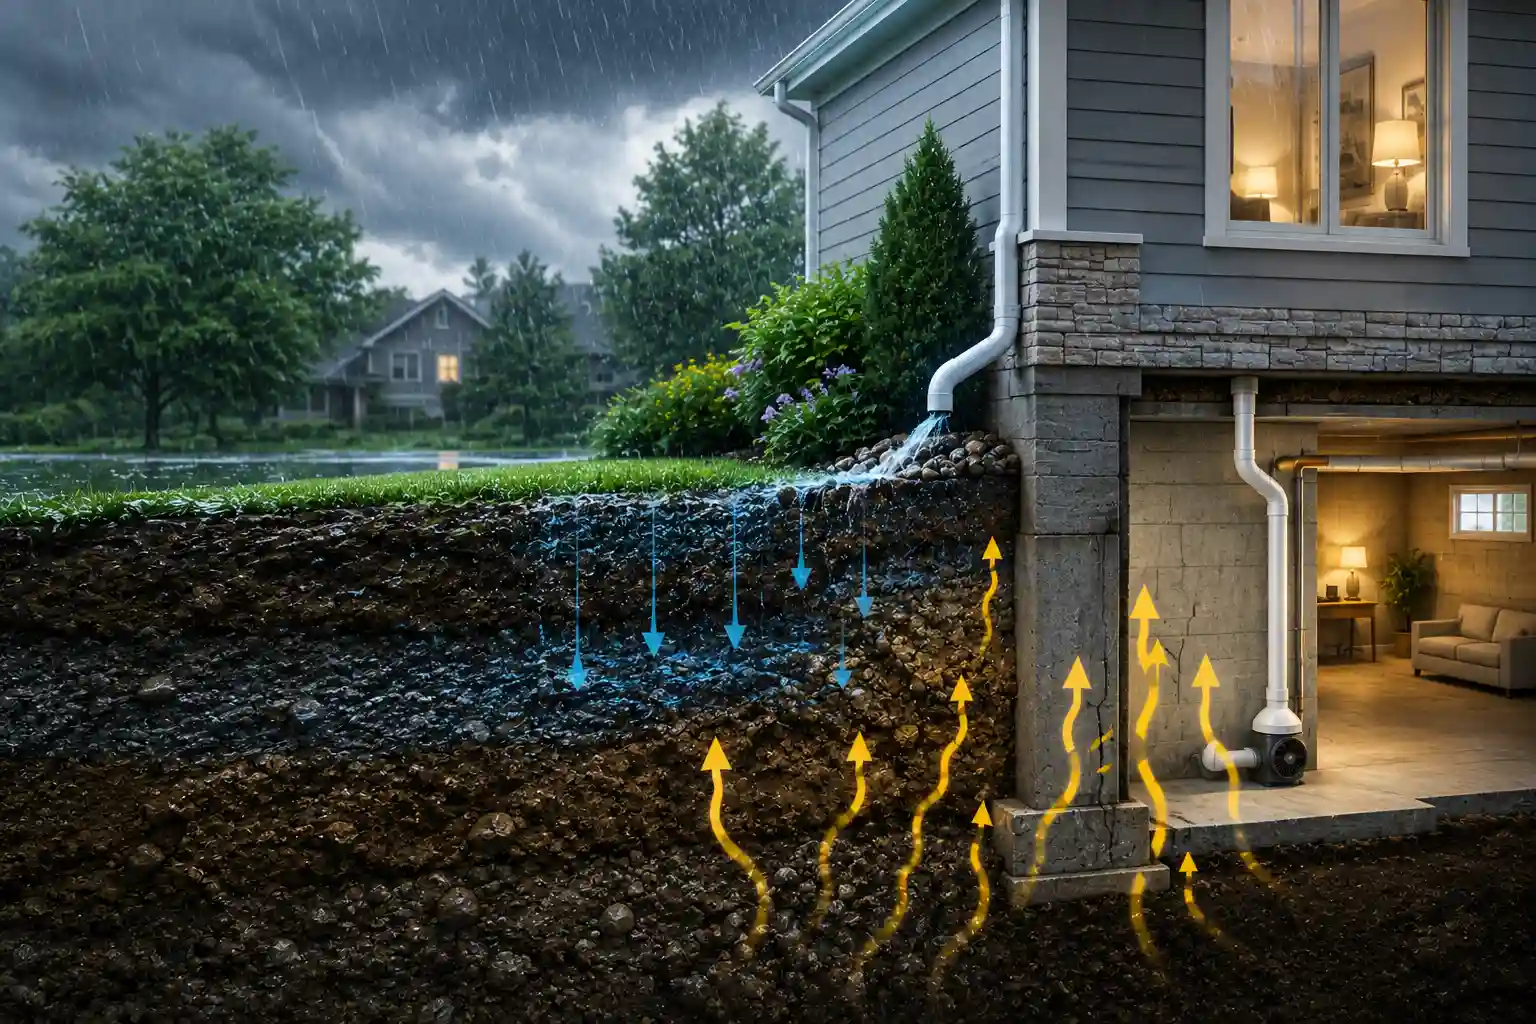
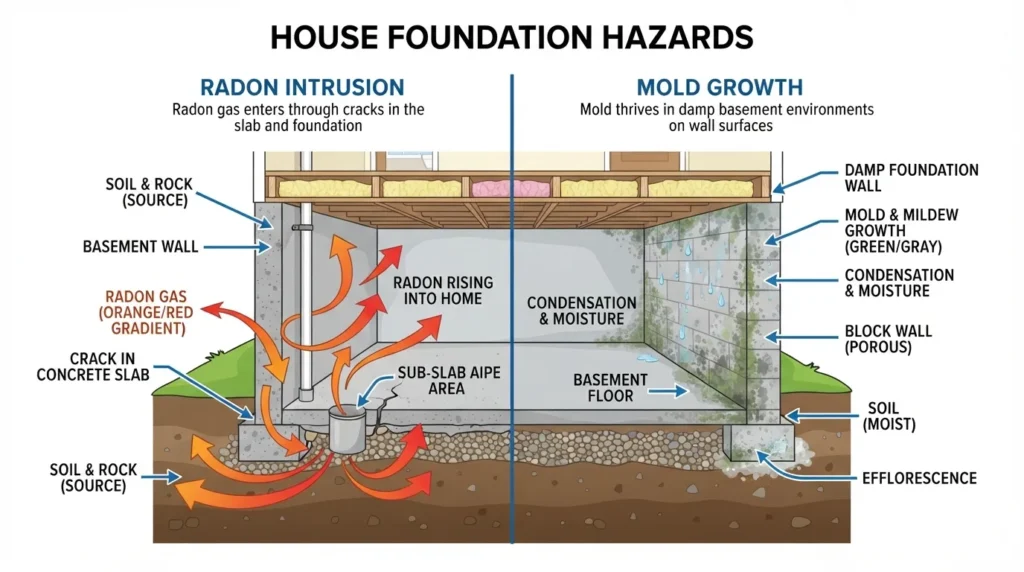
Radon gas comes from uranium decay in soil and rock. It enters homes through foundation cracks, sump pits, and gaps around pipes. Mold, by contrast, grows from excess moisture leaky pipes, poor ventilation, or a humid basement.
Homes with radon mitigation systems often have tighter, more depressurized basements, which can also reduce moisture buildup. That’s why many Milwaukee Radon Mitigation customers request mold and radon testing in the same visit one appointment, two critical answers.
What Is Radon and Why Does It Matter?
Radon is a naturally occurring, colorless, odorless radioactive gas classified by the EPA as a Class A human carcinogen. It’s the second-leading cause of lung cancer in the United States after smoking, according to the EPA and the Surgeon General.
Radon is measured in picocuries per liter of air (pCi/L). The EPA action level is 4.0 pCi/L at or above this threshold, mitigation is recommended. Wisconsin sits in a region with naturally elevated soil uranium, so radon testing is especially important in Whitefish Bay, Wauwatosa, West Allis, and South Milwaukee, where many homes have basements built directly on radon-permeable soil.
What Is Mold and How Does It Enter a Home?
Mold is a fungus that reproduces through airborne spores. It thrives in damp, poorly ventilated spaces basements, crawl spaces, bathrooms, and areas near past water damage.
Common indoor mold exposure symptoms include:
- Persistent coughing or wheezing
- Nasal congestion and sinus irritation
- Skin irritation or rashes
- Worsened asthma or allergy symptoms
- Headaches and fatigue in poorly ventilated rooms
Unlike radon, mold is sometimes visible as discoloration or detectable by a musty odor. But hidden mold behind drywall or under flooring often requires professional testing to confirm.
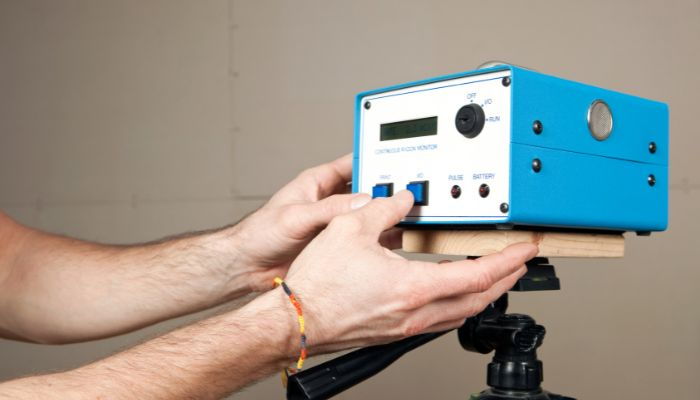
How Radon Testing Works
Radon testing follows ANSI/AARST protocols, the national consensus standards for measurement and mitigation. Two main methods exist:
- Short-term testing (2–7 days): Uses charcoal canisters or continuous radon monitors placed in the lowest lived-in level of the home.
- Long-term testing (90+ days): Provides a more accurate annual average, useful for homes with fluctuating readings.
For real estate transactions, short-term tests are standard. Learn more about the full radon testing and mitigation process and what to expect before, during, and after your test.
How Mold Testing Works
A certified mold inspector typically combines a visual inspection with air and surface sampling. Spore trap air samples compare indoor and outdoor mold concentrations to identify abnormal indoor growth. Swab or tape-lift samples confirm mold species on visible growth.
Results return from an accredited lab within days, identifying whether remediation is necessary and which species are present some, like Stachybotrys (black mold), pose greater health risk than others.
When Should You Test for Mold and Radon?
Test radon and mold under these circumstances:
- Buying or selling a home — Most Wisconsin real estate contracts include a radon contingency, and mold issues can derail financing or reduce appraised value.
- After a flood, leak, or water damage — Mold can develop within 24–48 hours of sustained moisture.
- Every two years for radon, per EPA guidance, since levels shift with soil conditions, seasons, and renovations.
- Before finishing a basement — Both tests protect the investment and the health of anyone using the new living space.
EPA Action Levels and Health Guidance
The EPA and World Health Organization both treat radon exposure as a serious, preventable health risk. The EPA’s action level of 4.0 pCi/L is the trigger point for mitigation, though the agency notes that no level of radon exposure is entirely risk-free.
Mold does not have a single federal exposure standard, but the CDC and EPA both recommend remediation of any visible mold growth larger than about 10 square feet, and professional assessment for anything larger.
If your home tests above the action level, review the full breakdown of symptoms of radon exposure to understand what elevated readings can mean for your household’s health over time.
How Sub-Slab Depressurization Reduces Radon
The most common and EPA-endorsed radon mitigation method is sub-slab depressurization (SSD). A radon fan draws gas from beneath the foundation slab and vents it above the roofline, before it can enter living space.
A properly installed SSD system can reduce indoor radon levels by up to 99%. Learn how a radon mitigation system works and why proper fan sizing and pipe placement determine long-term performance.
Why Certified Professionals Matter
Radon testing and mitigation should always be handled by professionals certified through the National Radon Proficiency Program (NRPP) or the National Radon Safety Board (NRSB). Certification ensures testing follows ANSI/AARST protocols and mitigation systems meet code requirements.
DIY radon test kits exist but carry higher risk of placement errors and false readings. For an accurate result especially ahead of a real estate closing professional, certified testing protects both your health and your transaction timeline.
How Much Do Mold and Radon Testing Cost?
Radon testing typically costs less than mold testing, since it requires simpler equipment and shorter turnaround. Pricing depends on home size, number of testing locations, and whether short-term or long-term monitoring is used.
Serving Whitefish Bay, Wauwatosa, West Allis, and South Milwaukee
Milwaukee Radon Mitigation provides certified mold and radon testing throughout Whitefish Bay, Wauwatosa, West Allis, and South Milwaukee. Our team follows ANSI/AARST protocols for every test and installs EPA-compliant sub-slab depressurization systems when mitigation is needed.
Homes in these communities often share older foundations and basement layouts that are more susceptible to both radon intrusion and moisture accumulation making combined testing especially valuable for local buyers and sellers.
FAQ
Does a radon mitigation system also reduce mold risk?
Not directly, but a well-sealed, depressurized basement can reduce moisture infiltration, which lowers conditions favorable to mold growth.
What radon level requires mitigation?
The EPA recommends mitigation at or above 4.0 pCi/L. Some homeowners choose to mitigate at lower levels for added peace of mind.
How long does a radon test take?
Short-term tests run 2–7 days. Long-term tests run 90 days or more for a seasonal average.
Can I test for mold and radon myself?
DIY kits exist for both, but professional testing with certified equipment and accredited lab analysis produces more reliable, transaction-ready results.
Is mold testing required when selling a home?
It’s not always legally required, but many buyers and lenders request it, especially if past water damage is disclosed or visible.
Final Thought
Indoor air quality is not an in‑obvious but essential part of home maintenance. Mold and radon testing reveal hidden threats that can become costly life threats if ignored.
Building with radon resistant techniques, replacing worn fans, and scheduling prompt repairs keep your indoor environment clean for your family’s safety and for the property’s value.
When you have specialists on hand, the cost of a preventive test is a fraction of the price of your rescue. For a full home audit call 414‑455‑7279 today and keep your home breathing safely.