A typical radon fan costs between $150 and $550 for the unit alone, while professional fitting adds another $500 to $1,200 depending on home size, vent length, and local labour rates. When you combine the hardware price with the work of a certified installer, most homeowners see a total outlay of $700 to $1,800. If you need a fresh estimate for your house, dial 414‑455‑7279 and a qualified technician will walk you through the numbers.
Table of Contents
Why a Radon Fan Matters
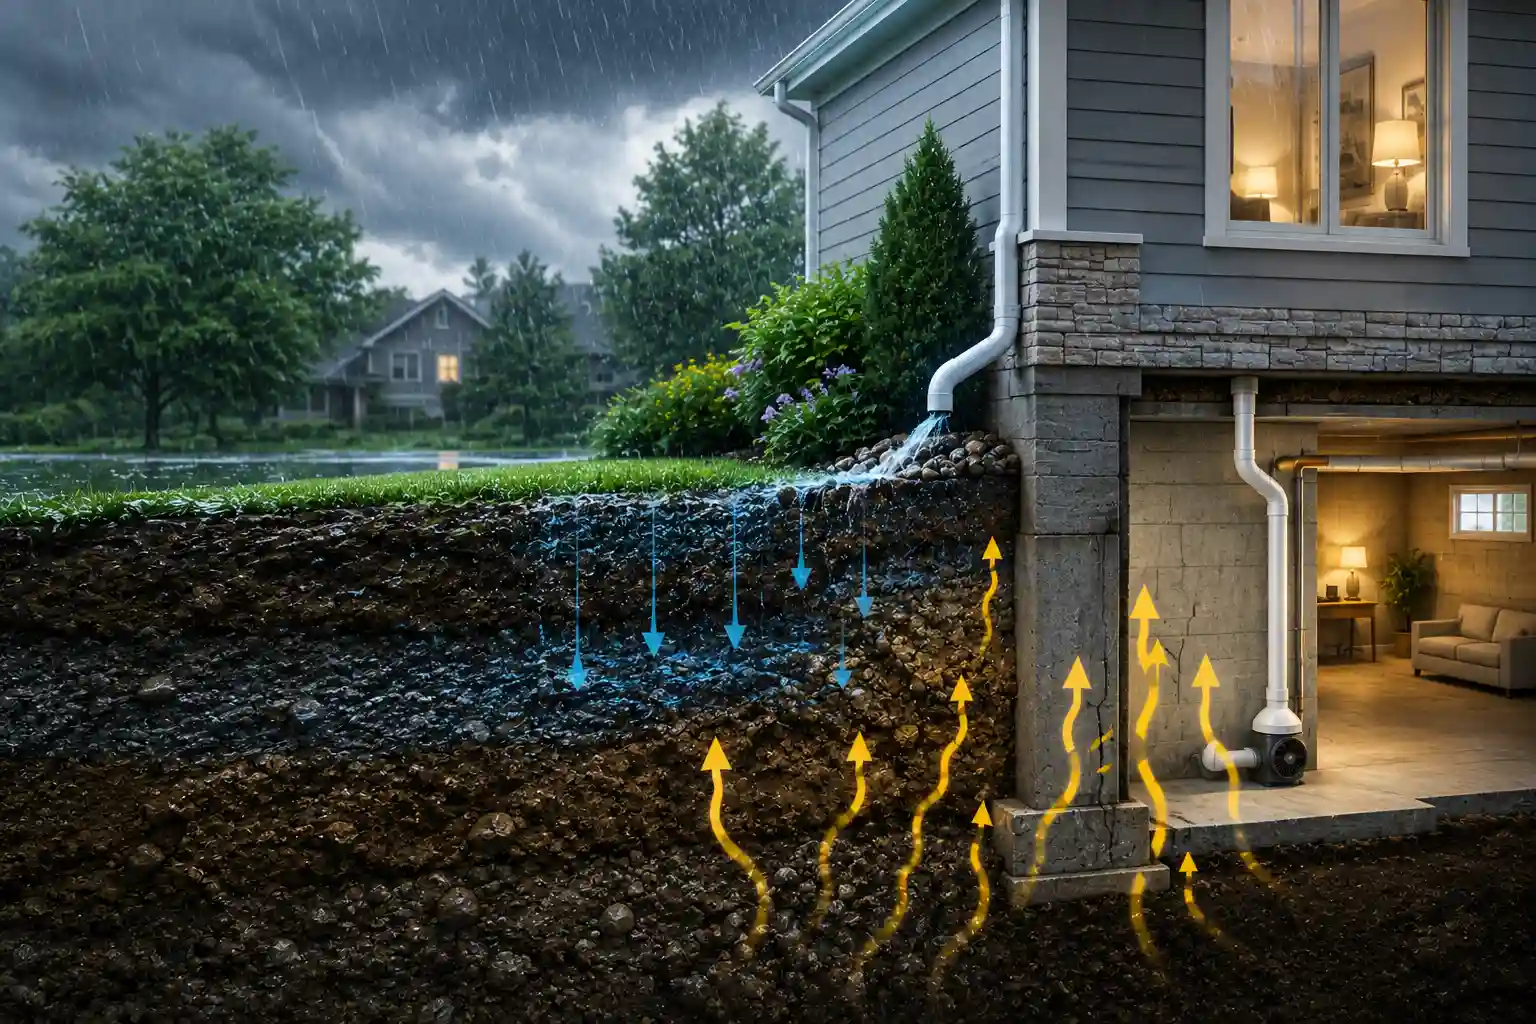
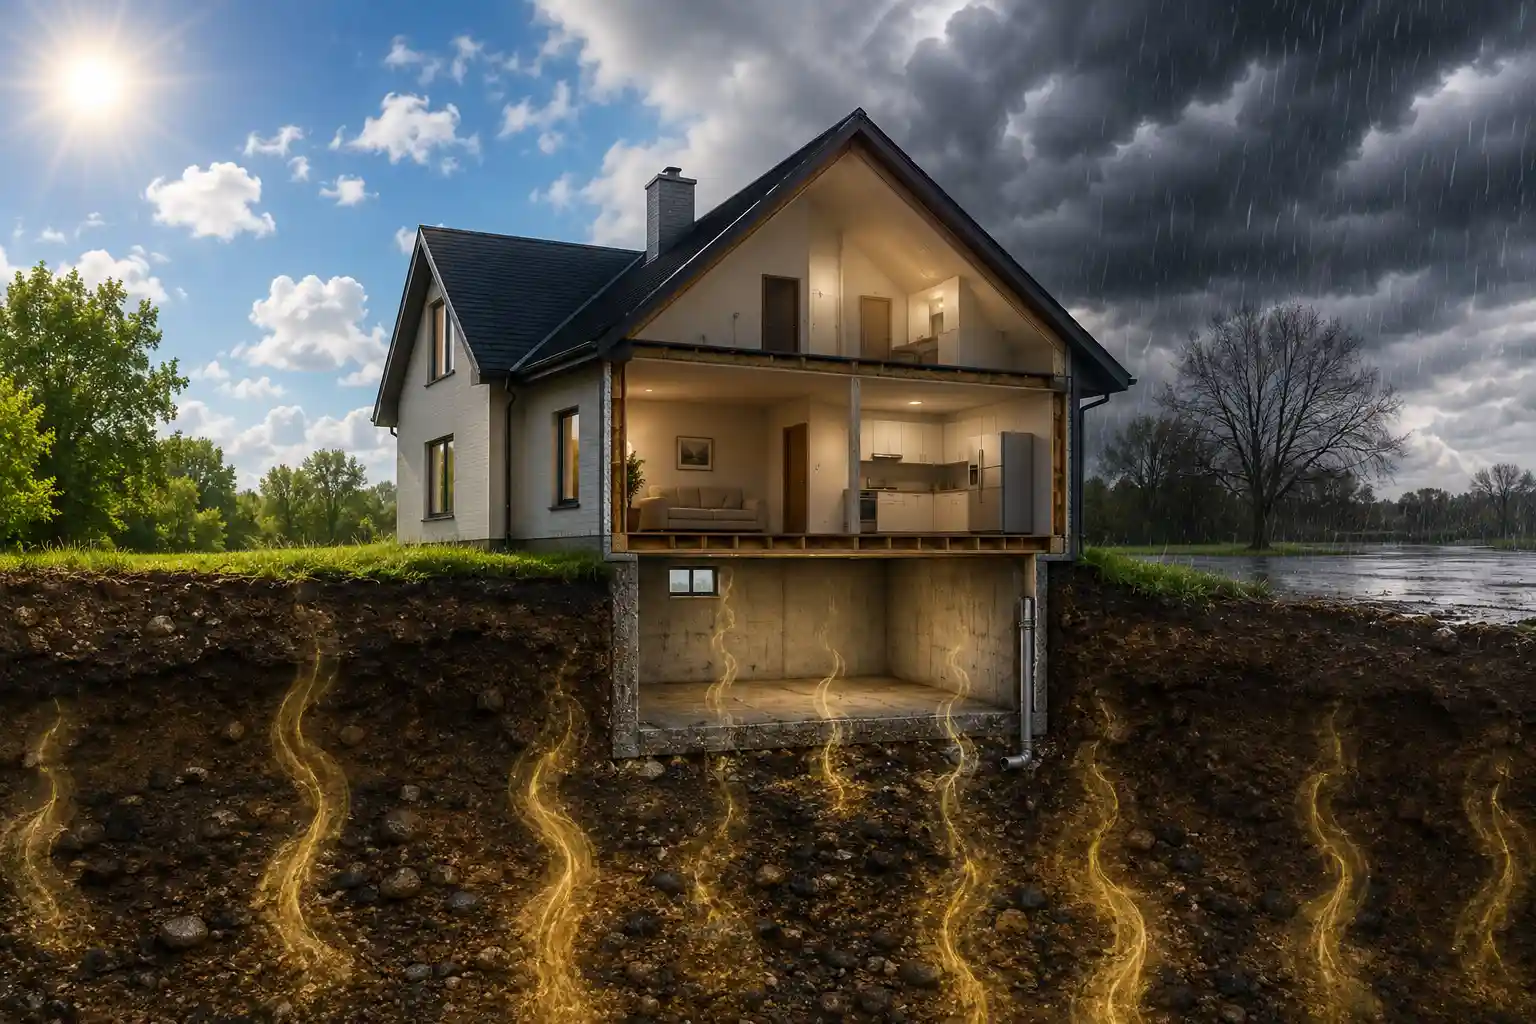
Radon is a colourless, odourless gas that can seep into any building that sits on soil containing uranium. Long‑term exposure is the second leading cause of lung cancer in the United States. The only reliable way to keep indoor radon levels below the EPA recommendation of 4 pCi/L is to install a mitigation system, and the heart of that system is the radon fan. Without a properly sized and positioned fan, the vacuum pressure needed to draw radon out of the home simply never materialises, and the health risk remains.
Main Types of Radon Fans
| Fan Type | Power Source | Typical Lifespan | Noise Level |
|---|---|---|---|
| Active (electric) | Electricity | 5‑10 years | 30‑45 dB |
| Passive (airflow driven) | None | 3‑5 years | No sound |
| Dual‑stage (high flow) | Electricity | 7‑12 years | 35‑50 dB |
Active fans dominate the market because they can maintain consistent suction regardless of outside temperature or house pressure changes. The radon fan cost for an active unit is generally higher than for a passive model, but the performance gap often justifies the price difference.
What Drives the radon fan cost
- Airflow Capacity (CFM) – Fans that move 150 CFM or more are priced toward the top of the range.
- Brand Reputation – Well‑known manufacturers charge a premium for proven reliability.
- Digital Controls – Units with built‑in monitors, alarms, or Wi‑Fi connectivity add $100‑$200.
- Material Quality – Corrosion‑resistant housing and sealed motor bearings increase durability and price.
- Regulatory Certifications – UL or CSA approval can add a small surcharge but ensures compliance with local codes.
Understanding these variables helps you compare quotes without getting lost in technical jargon.
Breaking Down the radon fan installation cost
| Item | Typical Price Range |
|---|---|
| Fan Unit | $150‑$550 |
| Labor (2‑3 hrs) | $200‑$400 |
| Soil Suction Pipe (10‑20 ft) | $50‑$150 |
| Vent Pipe (PVC, 4‑6 in) | $75‑$200 |
| Sealing Materials (caulk, mortar) | $30‑$100 |
| Permit Fees (if required) | $50‑$150 |
| Post‑installation Testing | $100‑$250 |
When you add the line items together, the radon fan installation cost generally lands between $700 and $1,800. Factors that push the price upward include long vent runs that must snake through finished spaces, steep crawl spaces that increase labour time, and local building department fees.
When Replacement Becomes Inevitable
Even the best radon fans will degrade over time. Signs that you need a new unit include:
- Persistent radon levels above 4 pCi/L after a mitigation test
- Unusual humming or grinding noises from the fan housing
- A sudden increase in electricity usage in the mitigation circuit
The radon fan replacement cost mirrors the original installation in many ways because you must remove the old unit, often repair or replace a portion of the vent system, and verify performance with a post‑work test. Average replacement projects run $800‑$2,200, with the fan itself still representing roughly 30 % of that total.
Hidden Expenses That Influence the Bottom Line
- Duct Insulation – In colder climates, insulated vent piping prevents condensation, adding $50‑$120 per 10 ft.
- Electrical Upgrades – Older homes may lack a dedicated 120‑V circuit, necessitating a new breaker and wiring for $150‑$300.
- Floor Joist Modification – When you have to cut through structural members to run piping, labor can climb by $200‑$500.
- Air‑Tightening the Home – Sealing cracks and openings before fan installation improves efficiency, often costing $300‑$800.
Although these items are not part of the core radon fan cost, they directly affect the total outlay and the long‑term effectiveness of the system.
DIY vs Professional Installation
Many homeowners ask if they can save money by installing the fan themselves. The short answer: Only if you have the right tools, knowledge of local codes, and a solid understanding of radon dynamics.
- DIY Savings – You might save $300‑$600 on labour, but you still need to purchase the fan and any required accessories.
- Risks – Incorrect pipe slopes, loose connections, or inadequate sealing can render the system useless, forcing a redo that ends up costing more than a professional job.
- Warranty Impact – Most manufacturers void the warranty if the unit is not installed by a certified technician.
If you value peace of mind and a guarantee that the system will work for years, the professional radon fan installation cost is a worthwhile investment.
Getting an Accurate Quote
- Schedule a Radon Test – A certified test will give you the current level and help the installer size the fan correctly.
- Provide Home Details – Square footage, number of stories, presence of a basement, and vent routing preferences all affect pricing.
- Ask for a Breakdown – Request a line‑item estimate that separates the radon fan cost, labour, materials, and testing fees.
- Compare Multiple Quotes – Hearing from at least three licensed contractors lets you spot outliers and negotiate better terms.
Your local radon mitigation specialist can answer these questions and provide a transparent radon fan replacement cost estimate. Call 414‑455‑7279 today for a free, no‑obligation quote.
Financing, Rebates, and Tax Incentives
- Utility Rebates – Some electric utilities offer rebates of $150‑$300 for installing an EPA‑approved radon mitigation system.
- Home Improvement Loans – Low‑interest personal loans or home equity lines of credit can spread the radon fan installation cost over several years.
- Federal Tax Credit – In certain states, you may claim a credit equal to 10 % of the total mitigation expense on your state tax return.
Checking with local government agencies, your utility provider, or a tax professional can uncover savings that lower the effective radon fan cost.
Longevity Expectations
A well‑installed, high‑quality fan typically lasts 7‑12 years before its motor efficiency drops below 80 % of original performance. Routine checks especially after major home remodels or heating‑system changes help you catch issues early.
- Annual Test – Perform a short‑term radon test each year to verify that the system remains effective.
- Visual Inspection – Look for rust, loose fittings, or cracked vent pipe every 2‑3 years.
If you follow this maintenance schedule, the radon fan replacement cost can be planned well in advance, avoiding surprise expenses.
Regional Price Variations
| Region | Typical Fan Unit Price | Typical Labor Rate |
|---|---|---|
| Midwest | $180‑$470 | $60‑$85 per hour |
| Northeast | $210‑$540 | $70‑$95 per hour |
| South | $150‑$420 | $55‑$75 per hour |
| West | $190‑$560 | $65‑$90 per hour |
The cost differences stem from local labour markets, building codes, and average house sizes. Even within a region, urban centres may charge more than rural areas.
Reducing the radon fan installation cost Without Compromising Safety
- Combine Projects – If you’re already sealing the basement or adding insulation, ask the contractor to bundle the radon work for a discount.
- Use Existing Penetrations – Leveraging pre‑existing openings for vent pipes can cut material costs.
- Choose a Standard Fan Model – Selecting a fan that meets the minimum required CFM for your home avoids paying for extra capacity you won’t use.
These strategies let you keep the radon fan cost within budget while preserving the system’s effectiveness.
What to Expect on the Day of Installation
- Arrival – The technician brings the fan, vent pipe, suction pipe, and sealing materials.
- Assessment – A quick walkthrough confirms the pre‑planned vent route and notes any obstacles.
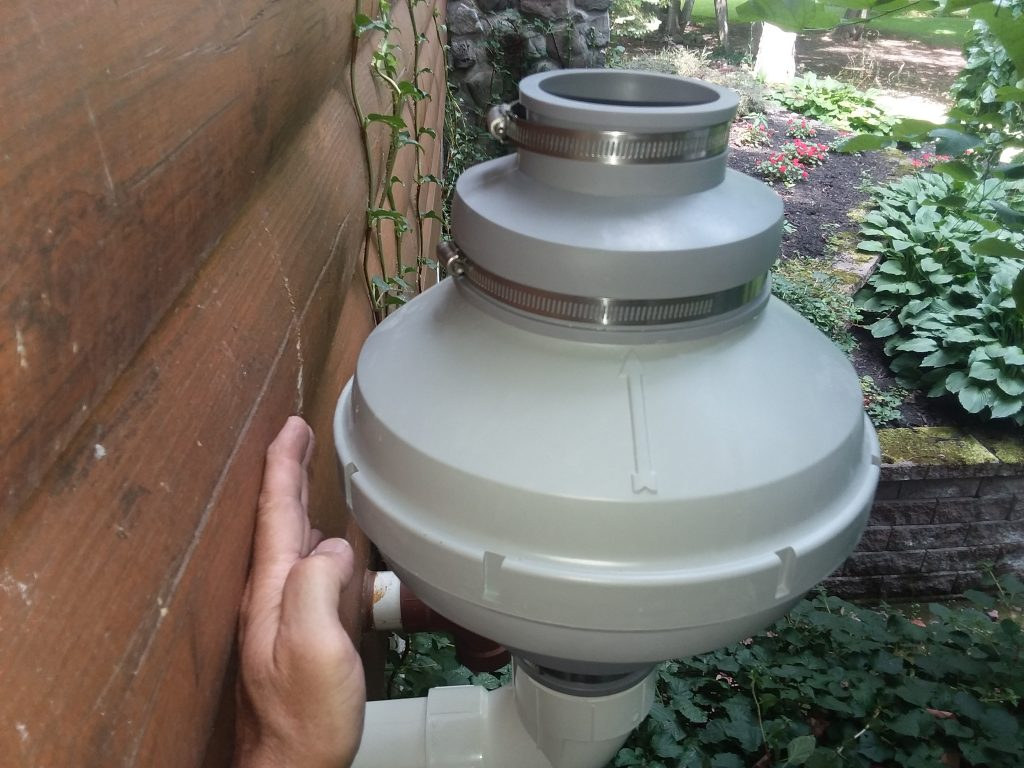
- Installation – The suction pipe is placed through the foundation slab or wall, connected to the fan, then to the vent stack that leads to the roof.
- Testing – After the fan runs for 24 hours, a certified radon test confirms that levels have dropped below 4 pCi/L.
The entire process usually finishes within a single business day, unless the home’s layout demands custom pipework.
Post‑Installation Maintenance Checklist
- Check Fan Operation – Listen for a steady hum and verify that the fan runs continuously.
- Inspect Vent Termination – Ensure the vent outlet is clear of debris and positioned at least 10 ft above the roofline.
- Record Results – Keep the radon test report and installation receipt together for future reference or resale purposes.
Regular attention to these items preserves the integrity of the mitigation system and protects your investment.
Common Misconceptions About the radon fan cost
| Myth | Reality |
|---|---|
| “All radon fans cost the same.” | Prices vary widely based on airflow capacity, brand, and built‑in monitoring features. |
| “If the fan is cheap, it will work just as well.” | Low‑cost fans often have lower CFM ratings and may not maintain adequate suction in larger homes. |
| “Installation is always expensive.” | While labor adds to the total, careful planning and using existing penetrations can keep the radon fan installation cost manageable. |
| “Once installed, no further testing is needed.” | Annual testing is recommended to verify continued effectiveness and catch any system degradation. |
Debunking these myths helps you make an informed decision about the radon fan replacement cost and overall mitigation strategy.
How Seasonal Changes Influence the radon fan installation cost
During winter, colder ground temperatures increase radon pressure, which may require a higher‑capacity fan to achieve the same reduction. Some contractors add a seasonal surcharge for winter installs due to longer work hours and the need for additional protective equipment.
Conversely, summer installations often enjoy quicker drying times for sealants and lower labor rates. Planning your mitigation during the milder months can shave a few hundred dollars off the radon fan cost and the overall project.
The Role of Professional Certification
Certified radon mitigators have completed training that covers:
- Proper fan sizing calculations
- Local code compliance
- Post‑installation testing protocols
Hiring a certified professional protects you from hidden costs and ensures that the radon fan installation cost includes all necessary permits and testing fees. Look for certifications such as the National Radon Proficiency Program (NRPP) or the American Association of Radon Scientists and Technologists (AARST).
Real‑World Examples of Full Cost Breakdowns
Example 1 – 1,800 sq ft suburban home
- Fan unit (active, 150 CFM) – $320
- Labor (3 hrs) – $450
- PVC vent pipe (12 ft) – $90
- Soil suction pipe (8 ft) – $60
- Sealing and caulk – $45
- Permit – $80
- Post‑test – $150
Total: $1,595
Example 2 – 2,400 sq ft two‑story house with long vent run
- Fan unit (dual‑stage, 180 CFM) – $480
- Labor (5 hrs) – $800
- Vent pipe (24 ft) – $190
- Suction pipe (15 ft) – $115
- Electrical circuit upgrade – $250
- Sealing work – $200
- Permit – $120
- Post‑test – $180
Total: $2,435
These case studies illustrate how the radon fan replacement cost can vary based on house size, vent routing, and any ancillary work required.
Frequently Asked Questions
What is the average lifespan of a radon fan?
A quality radon fan typically lasts between seven and twelve years. After that period, motor wear can reduce suction efficiency, so a replacement may be needed to keep indoor radon levels low.
Can I install a radon fan myself to save money?
DIY installation is possible for experienced homeowners, but improper sizing or venting can compromise the system. Professional installation guarantees compliance with codes and maintains manufacturer warranties.
How often should I test my home after a fan is installed?
It is best to perform a short‑term radon test one month after installation, then annually thereafter. Regular testing ensures the mitigation system continues to perform as expected.
Do I need a permit for radon mitigation?
Most jurisdictions require a building permit for radon mitigation work. The permit fee is typically included in the radon fan installation cost estimate.
What factors influence the radon fan replacement cost?
Key factors include the fan’s CFM rating, brand, any required vent pipe repairs, labour rates, and whether additional sealing or electrical upgrades are needed.
Final Thoughts
Understanding the components that make up the radon fan cost, the associated radon fan installation cost, and the inevitable radon fan replacement cost empowers you to make a financially sound decision without sacrificing safety. Whether you choose a DIY route or hire a certified professional, the goal remains the same: keep radon levels well below the EPA limit and protect your family’s health.
If you are ready to take the next step, call 414‑455‑7279 today. A licensed specialist will assess your home, provide a transparent estimate, and guide you through the entire mitigation process from initial testing to final certification.