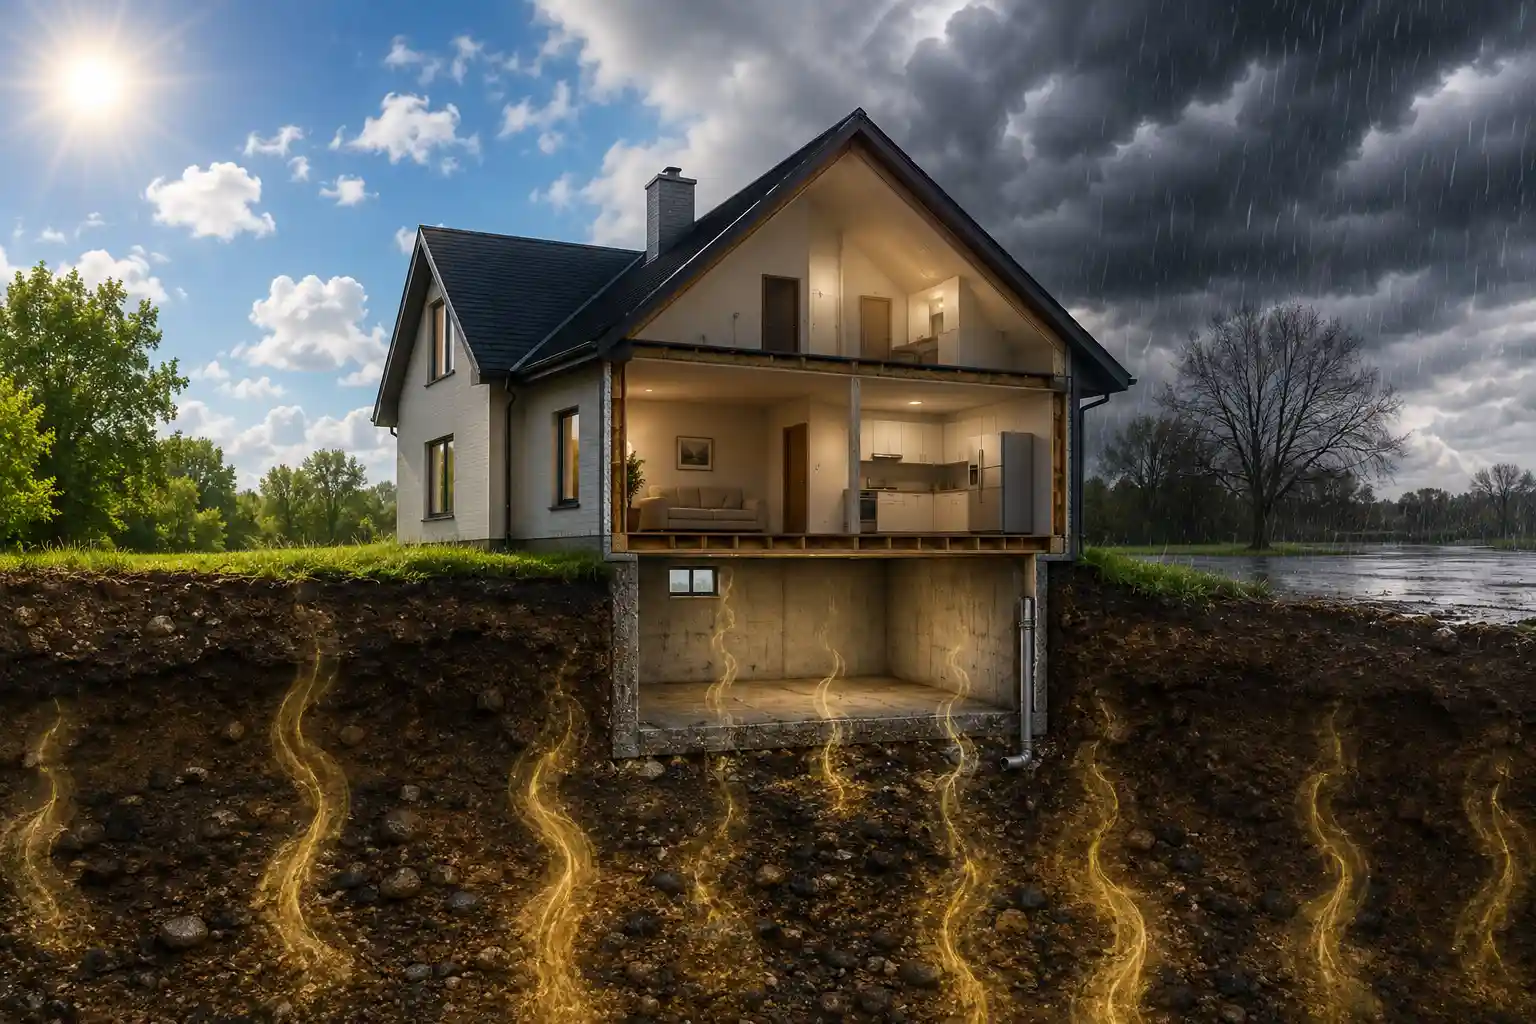
A radon mitigation system creates a controlled vacuum under a building’s foundation, pulls radon‑laden soil gas into a pipe, and vents the gas safely above the roof using a low‑noise fan. The constant suction keeps indoor radon levels below the EPA’s 4 pCi/L action level.
Table of Contents
How Radon Mitigation Systems Work
What Is Radon and Why It Matters?
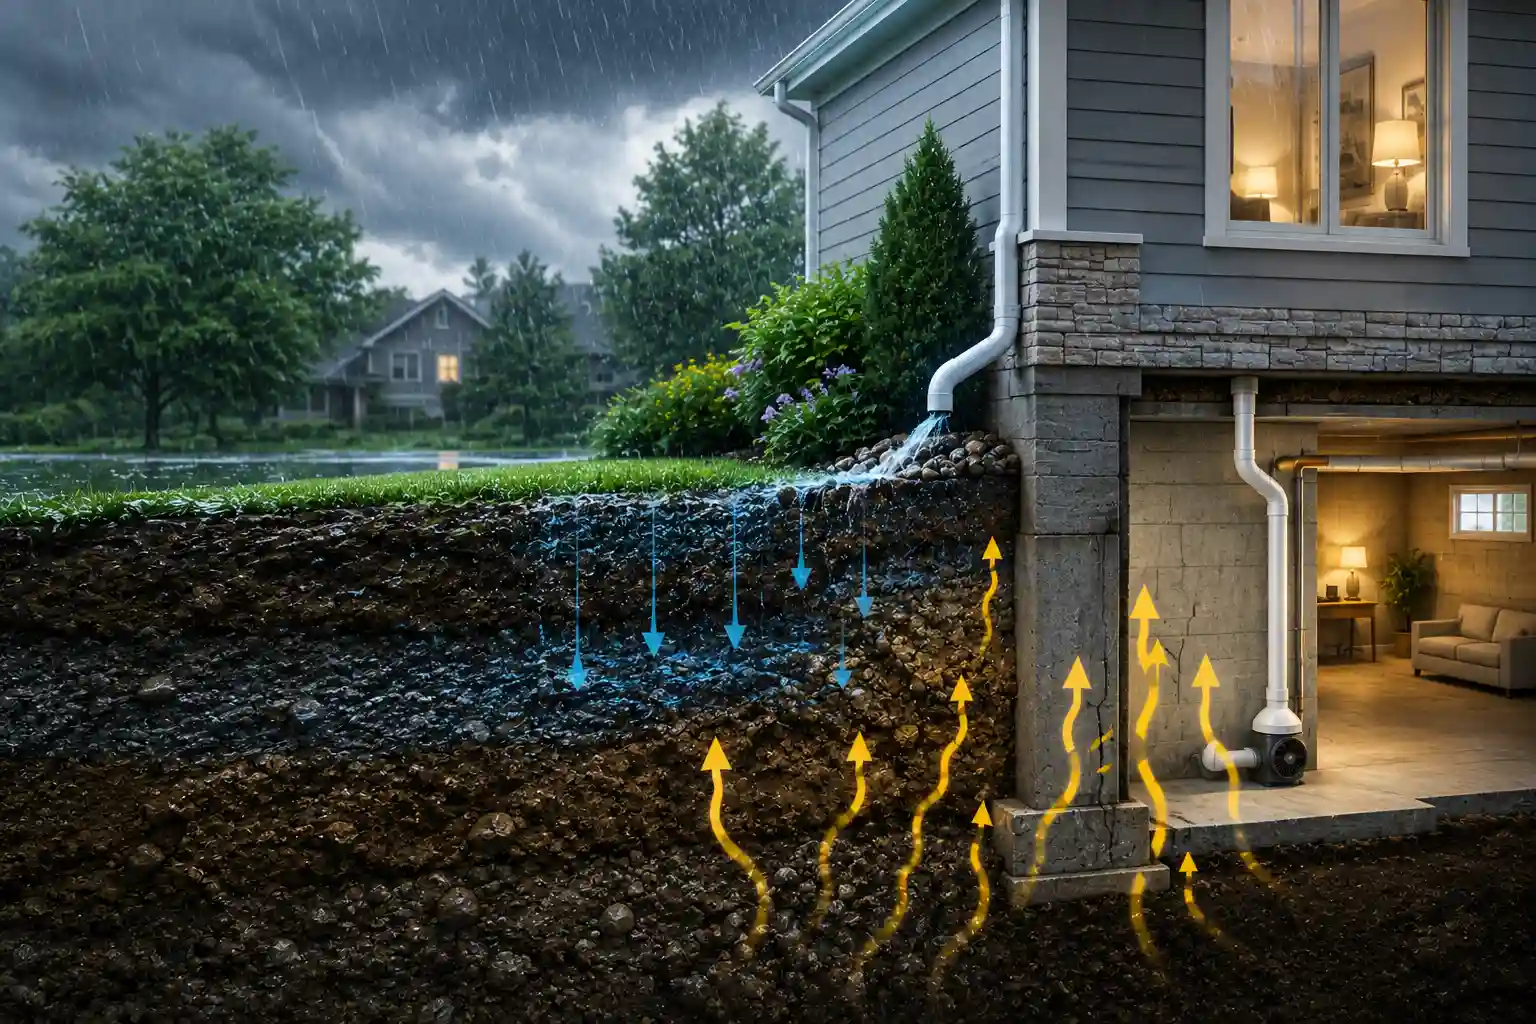
Radon‑222 is a colourless, odourless, radioactive gas that forms naturally when uranium in soil, rock, and water breaks down. Because it is heavier than air, radon can seep upward through cracks, gaps, and pores in a building’s foundation and accumulate in the lowest occupied spaces basements, crawl spaces, and ground‑floor rooms.
Key health facts
- The U.S. Environmental Protection Agency (EPA) estimates radon is responsible for about 21,000 lung‑cancer deaths each year.
- For non‑smokers, radon is the leading cause of lung cancer; for smokers, radon exposure multiplies the risk.
- Indoor radon is measured in picocuries per liter (pCi/L). The EPA’s “action level” is 4 pCi/L.
Because radon is invisible and odorless, the only reliable way to know if your home has a problem is to test it. If a test returns a result greater than 4 pCi/L, the next logical step is mitigation.
The Goal of a Mitigation System – what does a radon mitigation system do?
A well‑designed mitigation system accomplishes three core objectives:
- Capture radon that would otherwise enter living spaces.
- Transport the captured gas through a sealed conduit to the outdoors.
- Vent the gas at a height where it can disperse safely, while maintaining a pressure differential that prevents re‑entry.
When these objectives are met, indoor radon concentrations typically drop 70 %–99 %, keeping the home below the EPA action level.
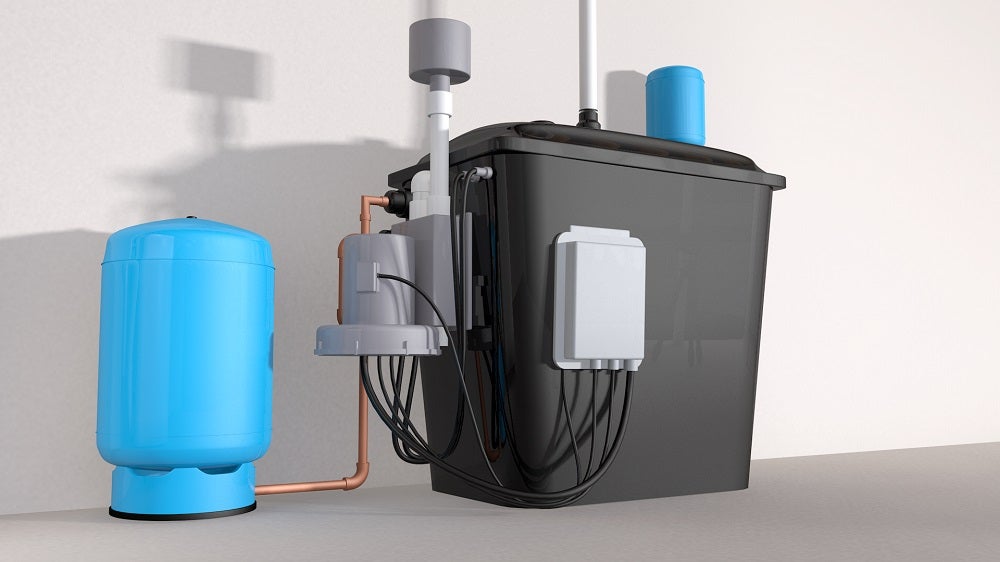
Core Components of a Typical System
| Component | Typical Specification | Function |
|---|---|---|
| Suction fan | 100‑250 CFM, 120 V, <10 W | Generates the vacuum that pulls radon from beneath the slab. |
| PVC vent pipe | 3‑inch Schedule‑40, smooth‑wall | Provides a low‑resistance path for the gas to travel upward. |
| Suction fitting | 1‑2 in. diameter, epoxy‑sealed | Connects the pipe to the suction point on the slab or wall. |
| Sealant (caulk, epoxy) | Polyurethane or silicone | Closes cracks, utility penetrations, and pipe openings to maintain pressure. |
| Electrical switch & monitoring | Manual on/off, optional pressure sensor or alarm | Allows homeowners to verify operation and receive alerts if suction fails. |
| Pressure gauge (optional) | 0‑30 Pa range | Confirms that the required sub‑slab depression is achieved. |
Each part works together to answer how does radon mitigation work: the fan creates suction, the pipe channels the gas, and the seals keep the vacuum effective.
Step‑by‑Step: how does a radon mitigation system work?
Below is the exact workflow that a professional installer follows, from the first test to the final verification. The numbered list contains concise, snippet‑friendly explanations that search engines love.
- Initial radon test – A certified short‑term test (48 hrs–7 days) measures the baseline level. The result determines whether mitigation is required.
- Site assessment – The installer inspects the foundation type (slab, crawl space, basement) and evaluates soil permeability, existing cracks, and utility penetrations.
- Select suction location – The largest, most accessible opening (often a pre‑existing floor drain) is chosen as the primary capture point.
- Drill or enlarge the radon capture hole – If necessary, a 1‑ to 2‑inch hole is drilled through the concrete slab or interior block wall. The opening is sealed with epoxy and fitted with a PVC coupling.
- Run the PVC vent pipe – A 3‑inch pipe is attached to the suction fitting and routed vertically through the building, exiting at the roof or an exterior wall. The pipe is kept as straight as possible to minimize friction loss.
- Install the suction fan – The fan is mounted on the exterior side of the vent pipe, typically just above the roofline, to prevent radon back‑flow. Wiring is connected to a dedicated circuit with a manual switch.
- Seal all gaps and cracks – Polyurethane caulk, expanding foam, or epoxy is applied to any visible cracks, pipe penetrations, and utility openings in the slab or foundation walls.
- Turn on the fan and check pressure – The fan runs continuously. A pressure gauge or built‑in sensor confirms a sub‑slab depression of at least 10 Pa, which is enough to keep radon from re‑entering.
- Post‑mitigation radon test – After 24‑48 hours of operation, a second certified test is placed in the same location as the initial test. The new reading verifies the system’s effectiveness.
- Documentation and homeowner briefing – The installer provides a written report, the final radon level, maintenance recommendations, and a warranty.
Each step is a bite‑sized answer to the question how does a radon mitigation system work, and it also creates a natural hierarchy that AI models can extract for featured snippets.
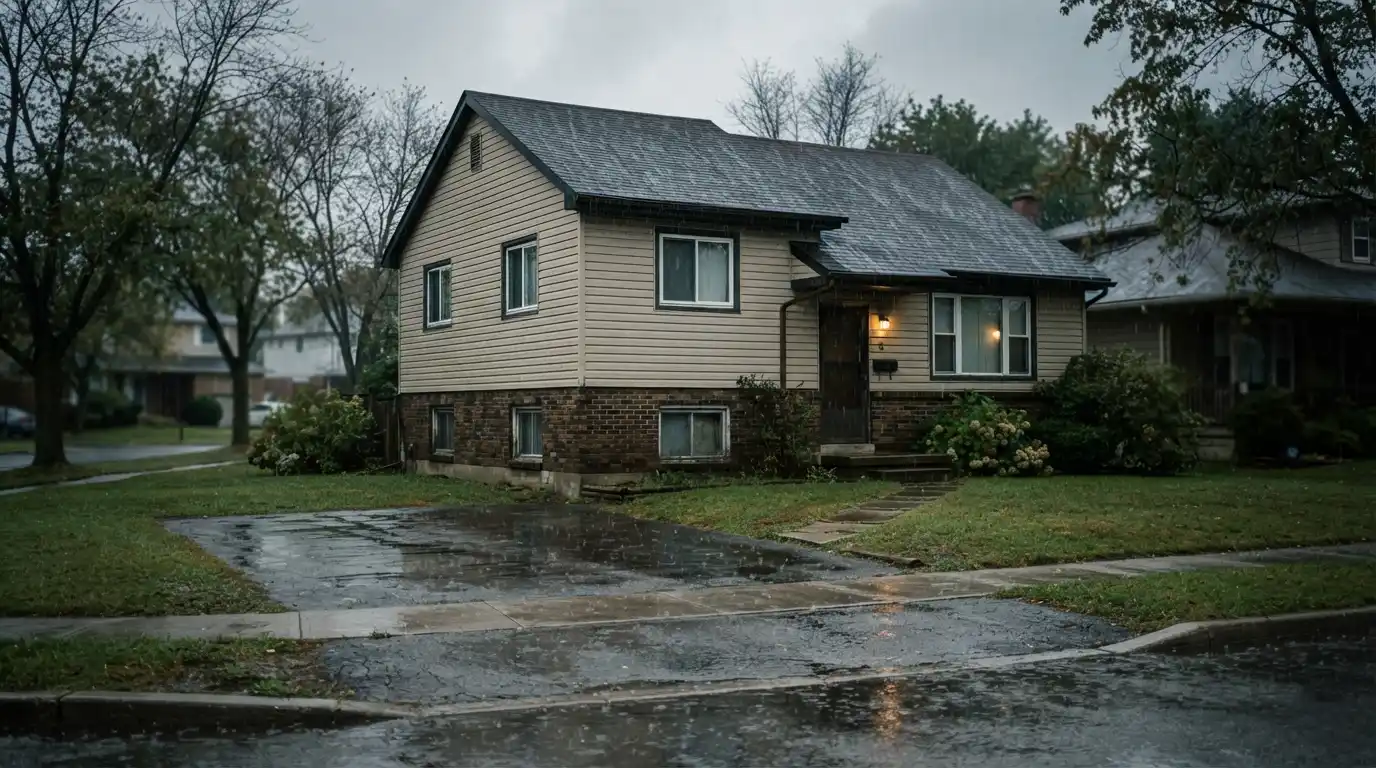
Visualizing the Installation – what does radon mitigation look like?
When you walk up to a home that has been mitigated, the visible components are minimal and blend with the building’s exterior.
- Exterior vent pipe – A smooth, white or gray PVC pipe that rises from the foundation to the roof. It may be painted to match the siding.
- Roof‑mounted fan – A compact, rectangular unit often hidden behind a vent cap or placed on the ridge. It is usually less than the size of a standard kitchen exhaust fan.
- Interior access panel – If a suction point is located in a basement or crawl space, a small access cover (often a round or square metal plate) is visible near the floor.
Inside the house, you typically won’t see any equipment; the only indication may be a thin vent pipe that runs through a wall cavity and terminates at a discreet exterior cap.
The understated appearance addresses the query what does radon mitigation look like while reassuring homeowners that the system does not compromise curb appeal.
Different System Types – how radon mitigation system works in various homes
Not every house uses a sub‑slab system. The underlying principle creating a pressure differential remains the same, but the point of suction changes.
| System Type | Ideal Building | Primary Suction Point | Typical Fan Placement |
|---|---|---|---|
| Sub‑slab depressurization | Concrete slab on grade | Hole drilled through slab or existing floor drain | Exterior, just above roof |
| Crawl‑space depressurization | Vented crawl spaces | Pipe attached to rim joist or interior wall | Exterior or interior wall |
| Block‑wall suction | Homes with hollow‑block walls | Inside the interior block wall, near floor level | Exterior, on wall vent |
| Drain‑pipe suction | Homes with foundation drainage systems | Existing French drain or perimeter pipe | Exterior, near drainage exit |
| Active soil depressurization with heat recovery | High‑performance or net‑zero homes | Sub‑slab or crawl‑space | Integrated with HRV/ERV unit |
Regardless of the configuration, the process still answers how radon mitigation works: a fan creates negative pressure, radon is drawn into a pipe, and the gas is exhausted safely.
Installation Details Worth Knowing
Pipe Length and Diameter
- Length: A longer pipe increases pressure loss. Most installers keep vertical runs under 30 ft; longer runs may require a larger‑capacity fan.
- Diameter: 3‑inch PVC is the industry standard for residential systems. Larger homes or homes on highly permeable soil sometimes need 4‑inch pipe to maintain the required flow rate.
Suction Fan Selection
- Flow rate: 100–250 CFM is typical. Higher flow rates create a stronger vacuum but consume slightly more electricity.
- Noise level: Look for fans rated < 55 dB at the fan inlet. Most modern units are whisper‑quiet once installed on the roof.
- Power: 120 V, single‑phase, < 10 W. The modest electricity cost is usually less than $5 per month.
Electrical Wiring and Controls
- Dedicated circuit: A 15‑amp breaker prevents overloads and simplifies troubleshooting.
- Switch: A wall‑mounted toggle switch lets the homeowner turn the fan off for maintenance.
- Monitoring: Optional pressure sensors or alarms can alert you via a small LED or a Wi‑Fi‑enabled notification if suction falls below 10 Pa.
Sealing Materials
- Polyurethane caulk: Ideal for small cracks (< ¼ in).
- Epoxy resin: Best for larger holes in concrete or where the pipe penetrates the slab.
- Expanding foam: Useful for sealing around utility penetrations, but avoid over‑filling near the suction point.
Each of these details reinforces the answer to how does radon mitigation work by ensuring the system maintains a reliable pressure differential.
Safety, Maintenance, and Performance Checks
Even the most robust system can lose efficiency if neglected. Follow this routine to keep the system humming:
| Frequency | Action | Why It Matters |
|---|---|---|
| Monthly | Visually inspect the fan and vent pipe for dust, debris, or animal nests. Verify the fan is running (you can feel a slight airflow at the vent cap). | Prevents blockage that would raise indoor radon levels. |
| Quarterly | Test the pressure gauge (or sensor) to confirm at least 10 Pa sub‑slab depression. | Confirms the vacuum is strong enough for continuous mitigation. |
| Annually | Conduct a professional radon retest (48‑hour short‑term). Replace fan motor if it shows signs of wear. | Guarantees the home stays below the EPA action level. |
| Every 5‑7 years | Replace the suction fan (most have a 10‑year warranty). Re‑seal any new cracks that may have appeared due to settling. | Extends system lifespan and maintains effectiveness. |
If the fan stops, the pressure differential collapses and radon can rebound to pre‑mitigation levels. Promptly addressing any malfunction is the most direct way to answer how does radon mitigation work on an ongoing basis.
Pricing & Cost Estimation
Understanding the financial side helps you plan and justify the investment. Below is a typical cost breakdown for a standard sub‑slab system in the United States. Prices are averages; local labour rates, home size, and soil conditions can shift the final amount.
| Item | Typical Cost (USD) | Description |
|---|---|---|
| Radon testing (pre‑ and post‑mitigation) | $100 – $250 per test | Certified short‑term test kit + lab analysis. |
| Suction fan | $150 – $300 | Low‑noise, 120 V, 150 CFM model. |
| PVC vent pipe (3‑inch, 10‑ft sections) | $50 – $120 | Includes pipe, fittings, and vent caps. |
| Suction fitting & epoxy seal | $30 – $80 | Hole drilling and permanent sealing. |
| Sealant (caulk, expanding foam) | $20 – $50 | Materials for crack sealing. |
| Electrical work & dedicated circuit | $150 – $300 | Wiring, breaker, switch, optional sensor. |
| Labor (installation) | $500 – $1,200 | Certified installer, 4‑6 hrs of work. |
| Total (average) | $1,100 – $2,500 | Includes everything needed for a fully functional system. |
Cost‑saving tips
- Bundled testing: Some mitigation companies include a free post‑mitigation test with the installation package.
- Local rebates: Many state or utility programs offer up to 30 % rebates for certified radon mitigation. Check your state’s environmental agency website.
- DIY kit: If you have experience with minor construction, a DIY kit (fan, pipe, sealant) runs $400‑$700, but you still need a professional test for verification.
Being transparent about pricing helps you answer the question how does radon mitigation work not just technically, but also financially.
DIY vs. Professional Installation
| Factor | DIY Approach | Professional Service |
|---|---|---|
| Initial testing | Purchase a kit, follow instructions, send sample to lab. | Certified tester uses calibrated equipment, provides detailed report. |
| System design | Follow generic guidelines; risk of undersized fan or improper pipe routing. | Engineer evaluates soil permeability, house layout, and selects optimal fan/pipe size. |
| Installation quality | May miss hidden cracks, improper sealing, or inadequate vent height. | Trained crew drills correct suction point, seals with epoxy, and complies with local building codes. |
| Warranty & insurance | Usually none; any errors are your responsibility. | Most contractors offer 1‑year labor warranty and liability coverage. |
| Cost | $400‑$800 for materials + test fees. | $1,200‑$2,500 (includes labor, materials, permits, and test fees). |
| Long‑term reliability | Variable; depends on skill level. | High; systems are built to maintain the required pressure differential for years. |
If you answer how does radon mitigation work by relying on a professional, you are more likely to achieve the targeted reduction and avoid costly re‑work.
Common Myths and Facts
| Myth | Fact |
|---|---|
| Radon only occurs in old homes. | Radon can be found in any home built on uranium‑bearing soil, regardless of age. |
| Leaving windows open will eliminate radon. | Ventilation dilutes radon temporarily but does not provide a permanent solution. |
| Radon levels are the same year‑round. | Levels can rise in winter when homes are sealed, and drop in summer when doors and windows are open. |
| A cheap fan will work just as well. | Fan capacity and noise rating are engineered to create sufficient vacuum; under‑powered fans fail to maintain pressure. |
| Mitigation systems increase energy bills dramatically. | Most fans draw less than 10 W, translating to less than $5/month on an average electricity rate. |
Addressing these misconceptions directly reinforces the central answer to how radon mitigation works and builds trust with readers.
Homeowner Checklist
- Conduct an initial radon test (48‑hour short‑term kit).
- Review test results; if ≥ 4 pCi/L, schedule a professional assessment.
- Verify that the contractor is certified by the National Radon Proficiency Program (NRPP) or equivalent.
- Ask the installer to explain the planned suction point, pipe route, and fan model.
- Ensure all cracks, utility penetrations, and slab openings will be sealed with epoxy or caulk.
- Confirm the vent pipe will extend above the roofline (minimum 10 ft above the highest opening).
- Verify the fan is wired to a dedicated 15 A circuit with a manual on/off switch.
- Request a post‑mitigation radon test to be performed 24‑48 hours after the fan is on.
- Keep a copy of the final radon report and system warranty in a safe place.
- Set a reminder for annual radon retesting and semi‑annual fan checks.
Having this list in hand makes the whole process transparent and eliminates surprise questions about how does a radon mitigation system work.
Frequently Asked Questions
How soon after installation will radon levels drop?
Most systems show a measurable reduction within 24 hours of continuous fan operation, with final levels stabilizing after a few days of testing.
Can radon mitigation be combined with a whole‑house fan?
Yes, but the radon fan must remain on at all times; a whole‑house fan should be installed downstream of the radon exhaust to avoid pulling contaminated air back inside.
Is there any maintenance required for the fan?
The fan is designed for continuous operation and typically needs only a visual inspection and occasional cleaning of the vent cap; replace the motor after 10‑12 years.
Does radon mitigation affect my home’s resale value?
Homes with a verified mitigation system and recent test results often sell faster and at a higher price because buyers see the health risk as already addressed.
What if my home has a basement and a slab?
A dual‑system approach is common sub‑slab suction for the slab area and a perimeter block‑wall or basement suction point for the lower level, both feeding into a single vent pipe.
Conclusion
Understanding how does a radon mitigation system work boils down to three simple actions: capture, transport, and vent radon so that indoor concentrations stay below the EPA’s 4 pCi/L action level.
The system’s modest hardware a suction fan, PVC vent pipe, and proper sealing does the heavy lifting, while continuous operation maintains the pressure differential that keeps radon out.
A step‑by‑step installation from the first test, through site assessment, to post‑mitigation verification provides a clear roadmap for any homeowner. Visual cues answer what does radon mitigation look like, and a cost breakdown shows that the investment is both affordable and often eligible for rebates.
Whether you choose a DIY kit or a certified professional, the core principle remains the same: a controlled vacuum that pulls the invisible threat out and releases it safely above the roof.
By following the maintenance schedule, retesting annually, and sealing any new cracks, you ensure the system continues to protect your family for years to come.