
Radon is one of those home hazards most people never see, smell, or feel, yet it quietly affects millions of homes. If testing has shown elevated radon levels in your house, the next logical question is simple and practical. What does it actually take to fix it?
A radon mitigation system reduces indoor radon by pulling radioactive gas from beneath a home and venting it safely outside. Most systems are installed in one day, cost between $900 and $2500, and lower radon levels by up to 99 percent when professionally installed.
You will learn how a system works, what happens during installation, who typically installs these systems, and how much you should budget. By the end, you will understand whether installing one is a job to hire out or something you should never attempt yourself.
Table of Contents
Understanding What a Radon Mitigation System Actually Does
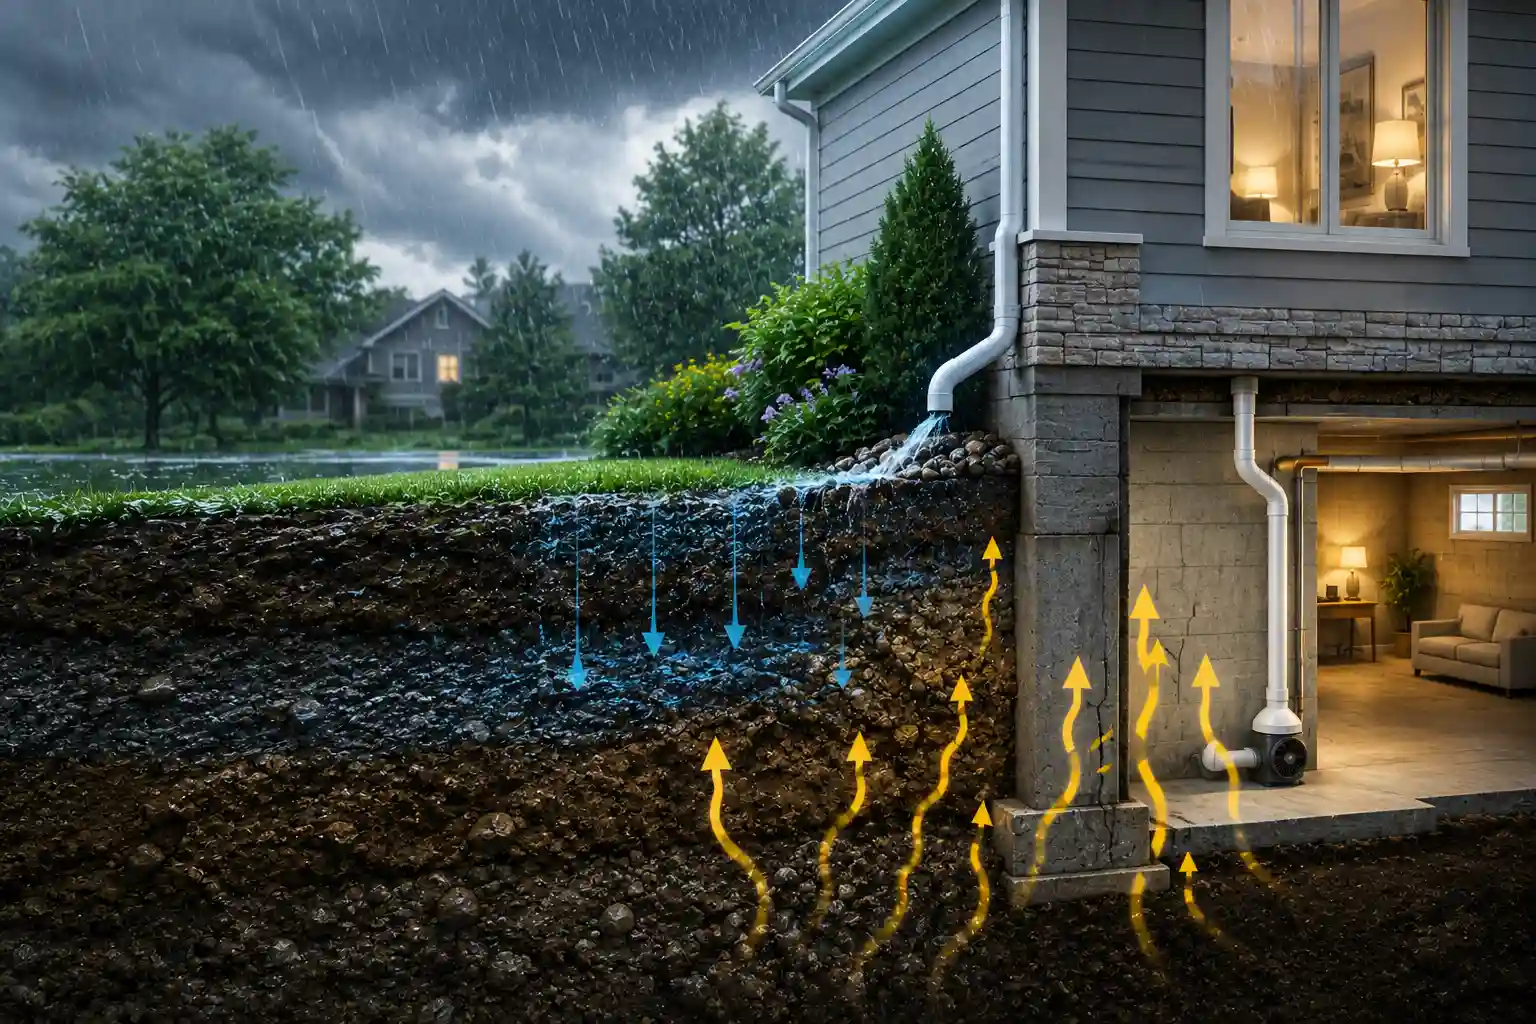
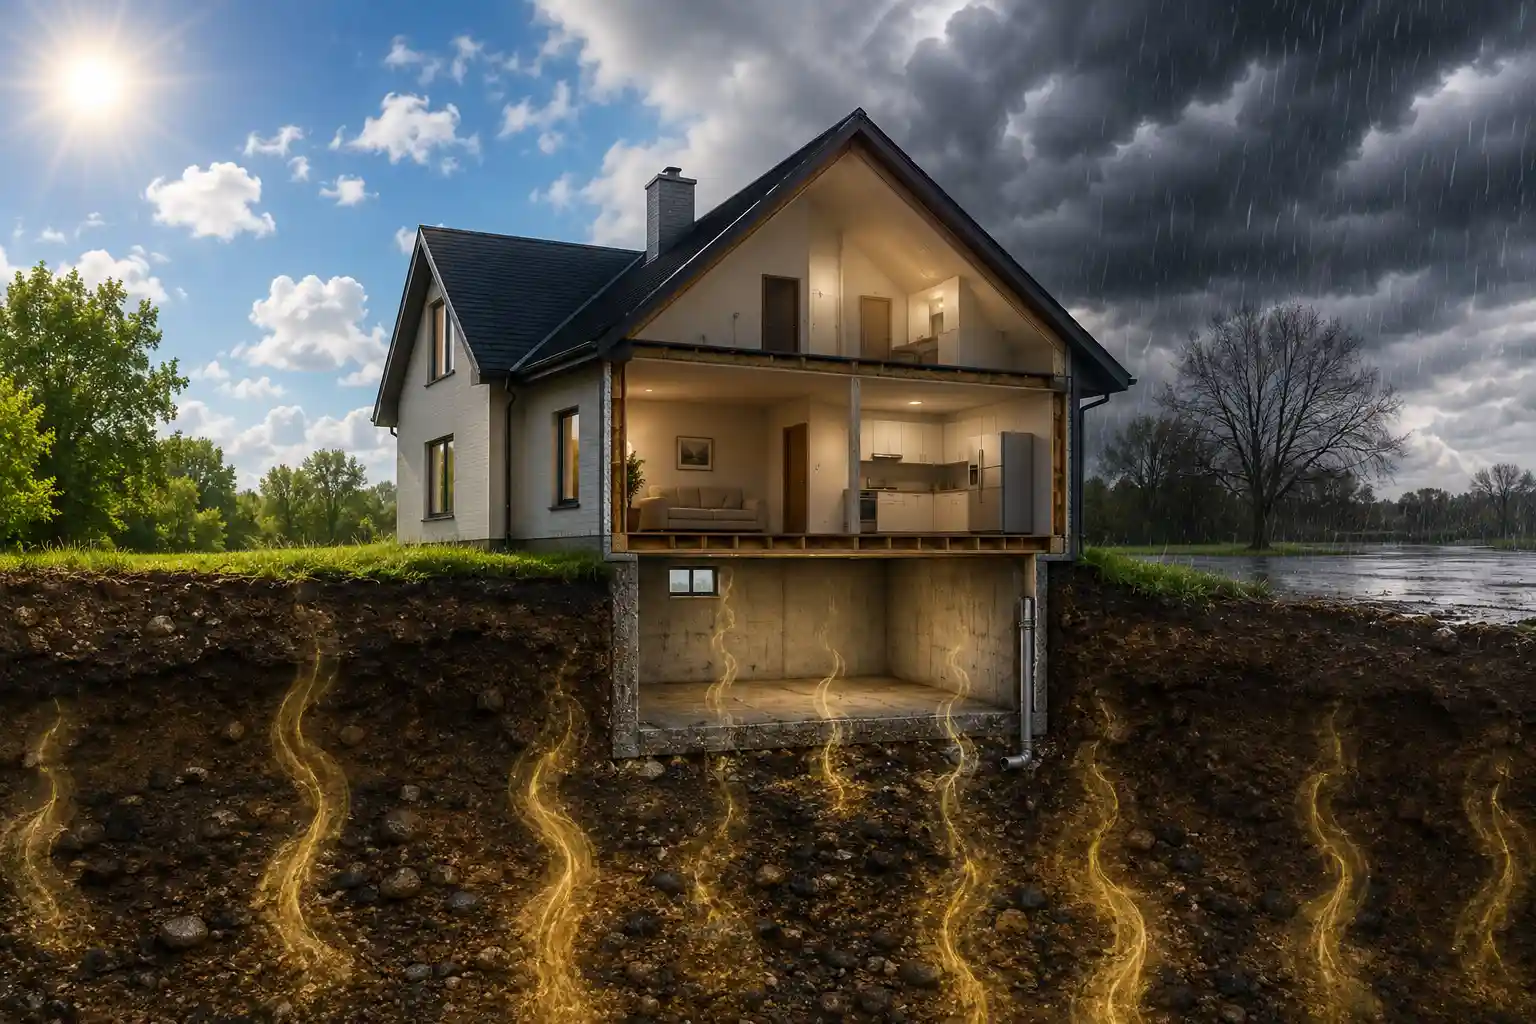
Before talking about installation, it helps to understand the basic purpose of a radon mitigation system. Radon gas forms naturally in soil and rock. It enters homes through cracks in foundations, sump pits, floor joints, crawl spaces, and utility penetrations.
A mitigation system does not seal radon out completely. Instead, it changes the pressure dynamics under your home so radon is pulled away before it enters living space.
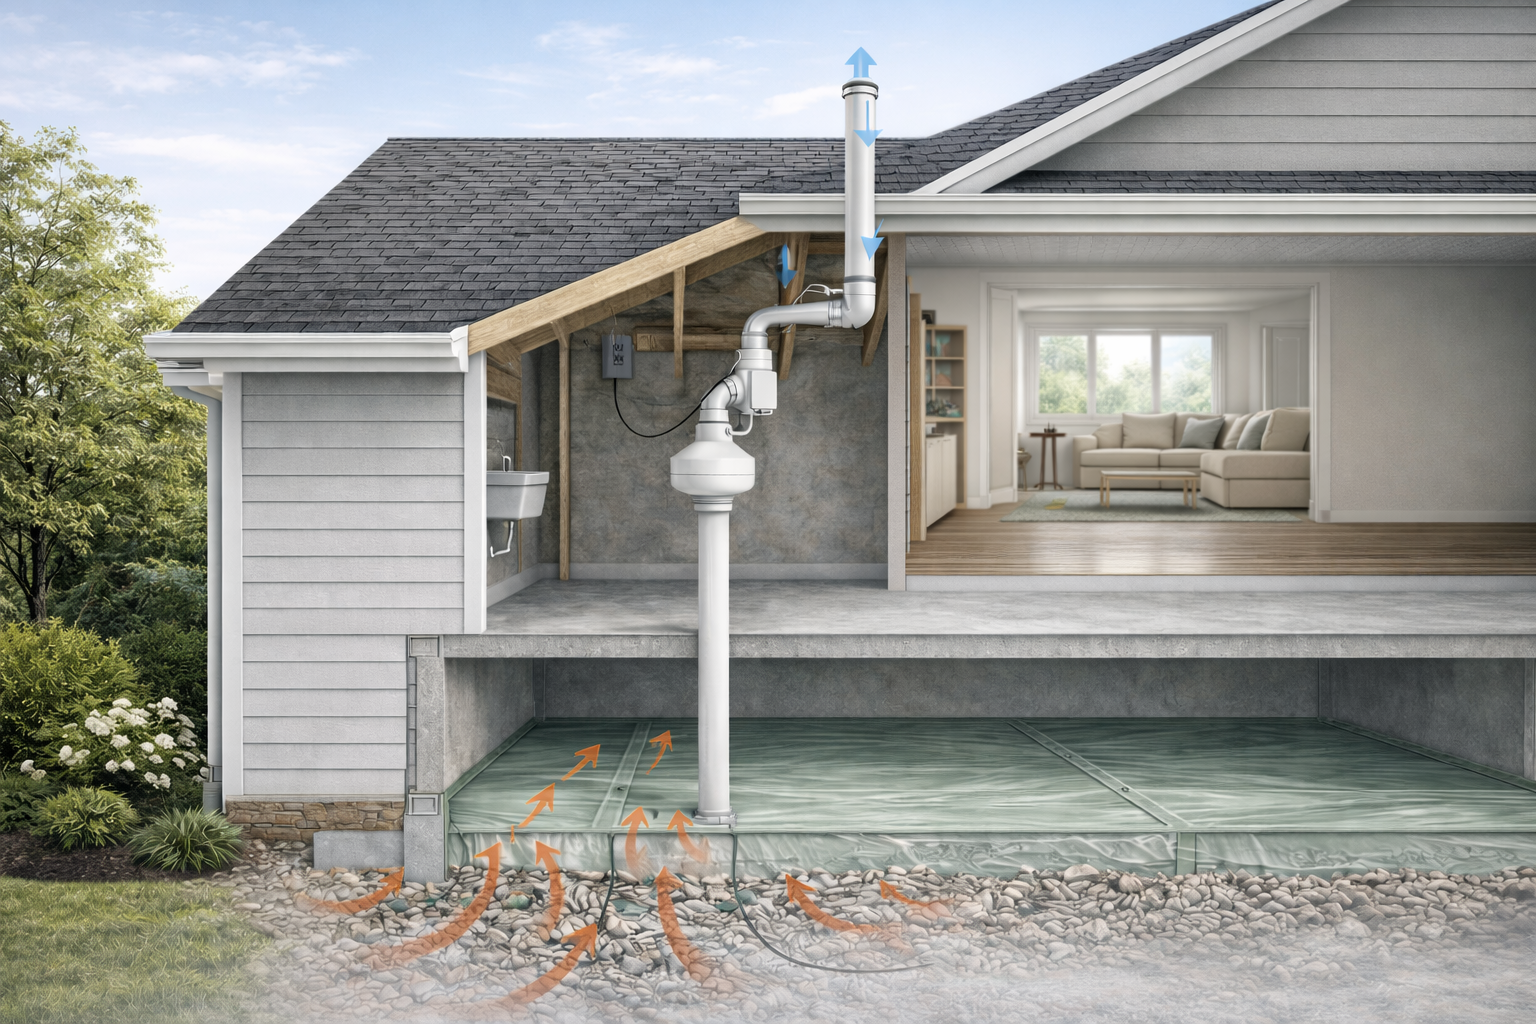
The most common residential solution is a sub slab depressurization system. A pipe is installed through the foundation slab or crawl space and connected to a radon fan. That fan continuously draws radon from beneath the house and vents it safely above the roofline.
When homeowners talk about install radon mitigation system projects, this is almost always the method being referenced.
When Installing a Radon Mitigation System Is Necessary
The Environmental Protection Agency recommends mitigation when indoor radon levels are 4.0 picocuries per liter or higher. Many homeowners choose to act even at lower levels if children live in the home or if long term exposure is a concern.
If you have completed a short term or long term radon test and the results are elevated, installing a system is not about panic. It is about risk reduction over time. Radon exposure is cumulative. Lowering levels now lowers risk later.
How to Install a Radon Mitigation System Step by Step
Homeowners often ask for a clear breakdown of the installation process. Here is what typically happens during a professional installation.
Site Evaluation and System Design
Every home is different. A slab on grade home, a basement foundation, and a crawl space all require different approaches. The installer evaluates foundation type, layout, sump locations, and existing penetrations.
This stage determines where suction points will be drilled and where piping and the fan will be routed. A good design minimizes noise, visual impact, and energy use while maximizing radon reduction.
Creating the Suction Point
A small hole is drilled through the concrete slab or crawl space membrane. Material beneath the slab is removed to create a small collection area. This allows soil gases to move freely toward the suction point.
This step is often the messiest part, but it is controlled and localized. Dust control and cleanup are standard practice for reputable installers.
Installing the Vent Pipe
PVC piping is connected to the suction point and routed vertically. The goal is a smooth upward path with minimal turns. Pipes typically run through utility areas, closets, garages, or exterior walls.
This piping is the backbone of the installation of radon mitigation system and directly affects performance.
Installing the Radon Fan
The fan is installed along the pipe run, usually in an attic, garage, or outside the home. Fans are never placed inside living spaces.
This is where installing radon mitigation fan selection matters. The fan must be properly sized for your home and foundation type. Too small and radon reduction suffers. Too large and energy use and noise increase unnecessarily.
Venting Above the Roofline
The pipe exits the home and terminates above the roofline. This ensures radon is released into outdoor air where it quickly dissipates and does not renter windows or vents.
Sealing and System Testing
Cracks, sump lids, and visible openings are sealed as supporting measures. Once the system is active, pressure readings are taken and post mitigation testing is scheduled to confirm success.
From start to finish, most installations take between three and six hours.
Can Homeowners Install Radon Mitigation Systems Themselves
This is one of the most common questions online. Technically, a skilled homeowner could assemble parts and install a basic system. Practically, this is not recommended.
Radon mitigation is not just plumbing or ventilation. It involves pressure diagnostics, fan sizing, airflow calculations, building code compliance, and safety considerations. Improper installation can reduce effectiveness or create moisture and back drafting issues.
When people search how to install radon mitigation system, what they often want is understanding, not a DIY checklist. In most cases, professional installation is the safer and more reliable option.
Do Plumbers Install Radon Mitigation Systems
Another frequent question is do plumbers install radon mitigation systems. The short answer is sometimes, but not usually.
Some plumbers offer radon services, but radon mitigation is a specialized field. Certified radon professionals receive specific training on soil gas movement, system diagnostics, and testing standards.
A plumber may be excellent with piping but unfamiliar with radon specific performance requirements. Always ask about certification, experience, and post installation testing procedures before hiring anyone for radon work.
What Homes Are Best Suited for Radon Mitigation
Most homes can be successfully mitigated. Basements and slab foundations respond very well to active systems. Crawl spaces may require encapsulation combined with depressurization.
Older homes with stone foundations or complex additions may need multiple suction points, but high radon levels are still typically reduced to safe ranges.
The key takeaway is that radon mitigation is effective across nearly all residential construction types when properly installed.
Pricing What Does It Cost to Install a Radon Mitigation System
Cost is a major factor for homeowners, and realistic expectations matter. Prices vary based on foundation type, home size, and complexity.
Here are common pricing ranges homeowners typically see.
- For slab or basement homes, most systems fall between $900 and $1800.
- Homes with crawl spaces or multiple suction points may range from $1200 to $2500.
- Large or complex homes may exceed $3000 in rare cases.
These estimates usually include materials, labour, sealing, and a basic post installation test. Electrical work or advanced crawl space encapsulation may add to the cost.
When evaluating quotes, avoid focusing only on the lowest number. Quality design, proper fan sizing, and long term reliability matter more than saving a few hundred dollars upfront.
Operating Costs After Installation
Once installed, radon mitigation systems are relatively inexpensive to operate.
Most fans cost between $50 and $100 per year in electricity. Fans typically last five to ten years depending on usage and quality.
Replacing a fan usually costs between $300 and $600 including labour.
How Effective Are Radon Mitigation Systems
A properly installed system often reduces radon levels by 80 to 99 percent. Many homes drop below 2.0 picocuries per litre after installation.
Effectiveness depends on system design, foundation type, and sealing quality. Post installation testing is essential to confirm results.
Common Mistakes Homeowners Should Avoid
- Skipping post mitigation testing
- Choosing an installer without certification
- Placing fans in living spaces
- Ignoring system noise and vibration planning
- Assuming all systems are the same
Avoiding these mistakes ensures the system works as intended for years.
Maintenance and Long Term Monitoring
Radon mitigation systems require minimal maintenance. Homeowners should occasionally check the system indicator to ensure the fan is running.
Long term radon testing every two to five years is recommended. Retest after major renovations or HVAC changes.
FAQs
How long does it take to install a radon mitigation system?
Most radon mitigation systems are installed in one day, usually within three to six hours. Larger homes or crawl space systems may require additional time, but multi day installations are uncommon.
Will a radon mitigation system increase my energy bills?
The increase is minimal. Most systems use less electricity than a standard light bulb and add only a small amount to annual energy costs.
Is radon mitigation loud?
Modern radon fans are designed to operate quietly. When installed correctly outside living spaces, most homeowners barely notice any sound.
Can radon come back after installation?
Radon levels can change over time due to soil conditions or home modifications. Regular testing ensures the system continues to perform properly.
Does installing a radon mitigation system affect home value?
In many cases, it improves buyer confidence. A documented mitigation system and low radon levels are often viewed as a positive feature during resale.
Conclusion
Installing a radon mitigation system is not about fear. It is about control. You test, you identify a risk, and you reduce it in a proven, measurable way.
Understanding installing radon mitigation system processes helps homeowners ask better questions, evaluate quotes intelligently, and feel confident in their decisions. Whether you are preparing to sell a home, protecting your family’s long term health, or simply addressing test results, radon mitigation is a practical and effective solution.
The most important step is choosing experienced professionals like Milwaukee Radon Home, Call at 414-455-7279, confirming performance with testing, and viewing mitigation as a long term investment in your home’s safety.